FeedbackChimp offers a variety of tools to help you manage posts effectively, from creating and editing posts to assigning categories, setting statuses, and more. This guide provides an overview of the main features to help you organize and manage posts on your feedback boards.
1. Creating a Post
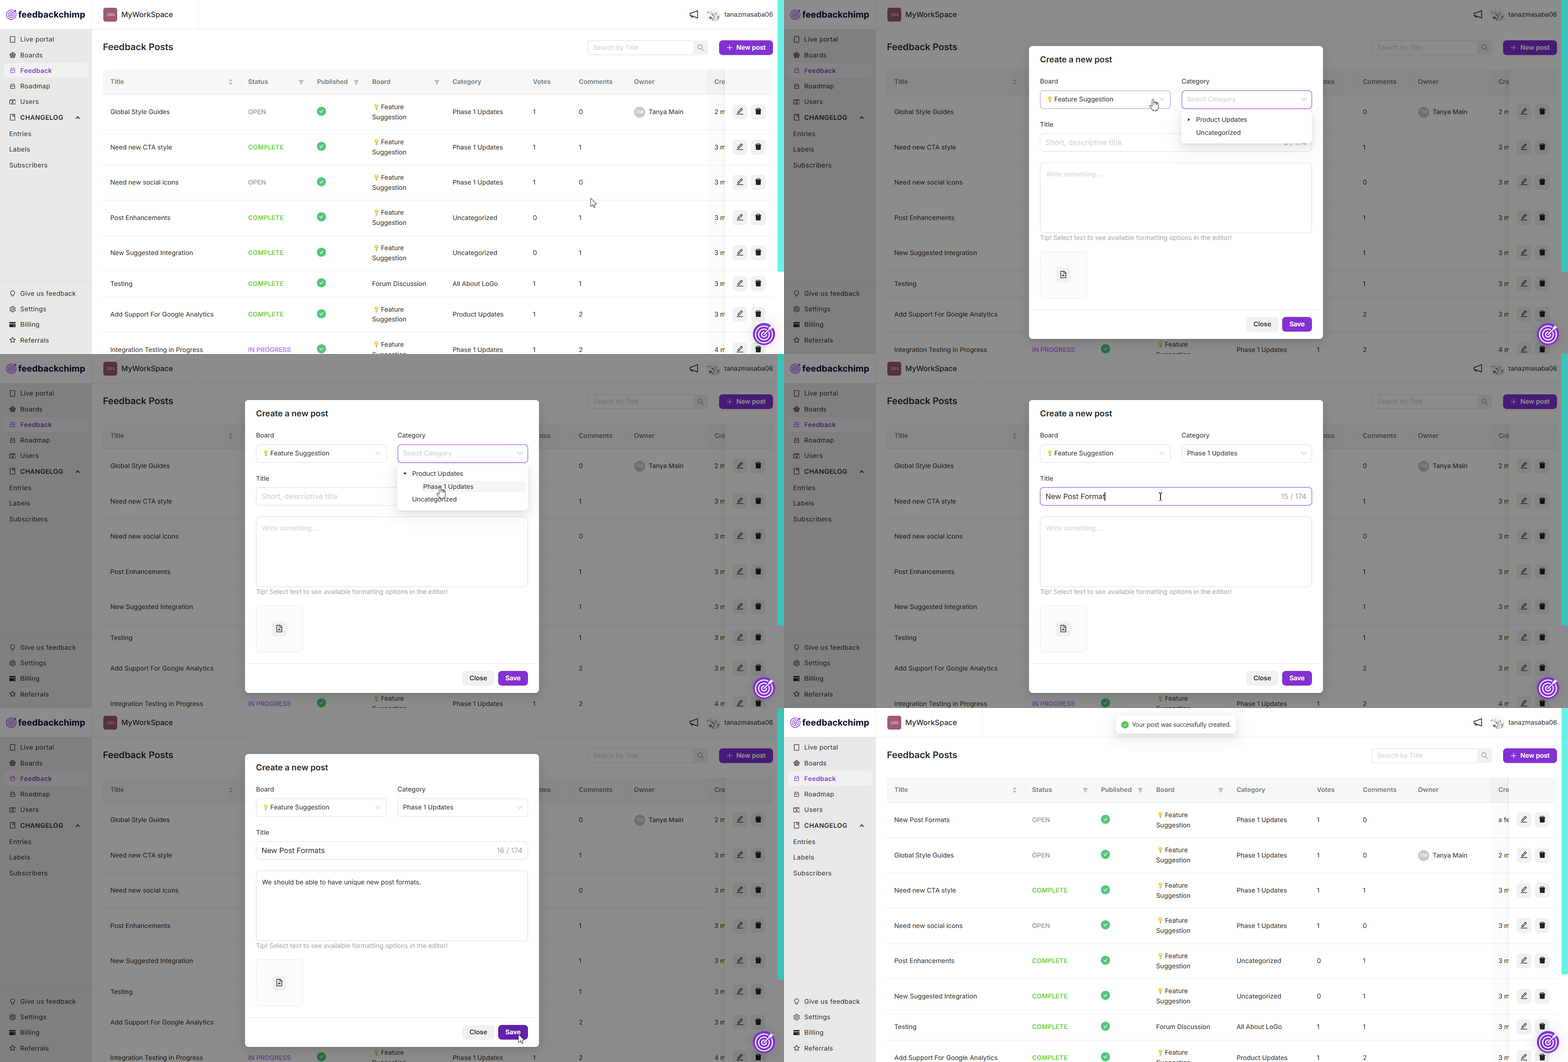
To create a new post in FeedbackChimp:
- Navigate to the Feedback tab from your dashboard.
- Click on the + New Post button.
- In the pop-up, assign the post to the appropriate Board and Category.
- Enter the Title and Description for your post. You can also attach images by clicking the image icon below the text box and add an email address.
- Click Submit to create the post.
2. Editing or Deleting a Post
You can edit any existing post to update details:
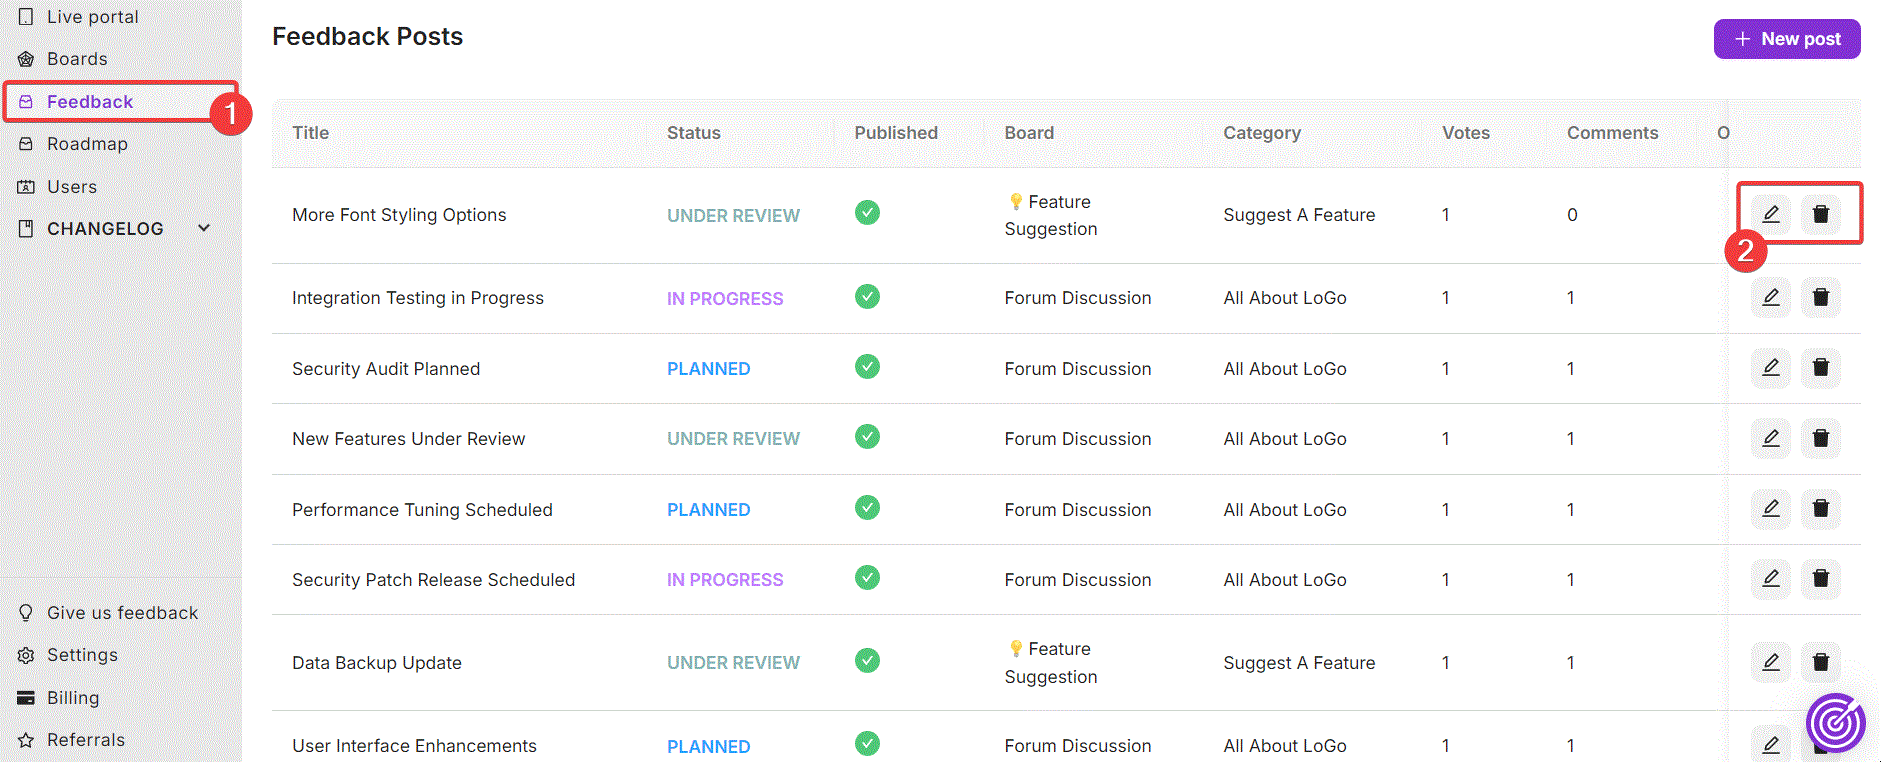
From the Feedback tab, locate the post you wish to edit and click on the Edit icon. To delete a post, click on the Delete icon.
4. Assigning Categories & Tags
Categories and Tags help organize and filter posts on your boards.
- Go to Boards--> Categories to create categories for your posts. You can also create subcategories. Check out the full step-step-by step guide on our documentation for creating Categories.
- From Boards-->Tags you can add tags by selecting the Tags option from the sidebar. For further details, see Tags.
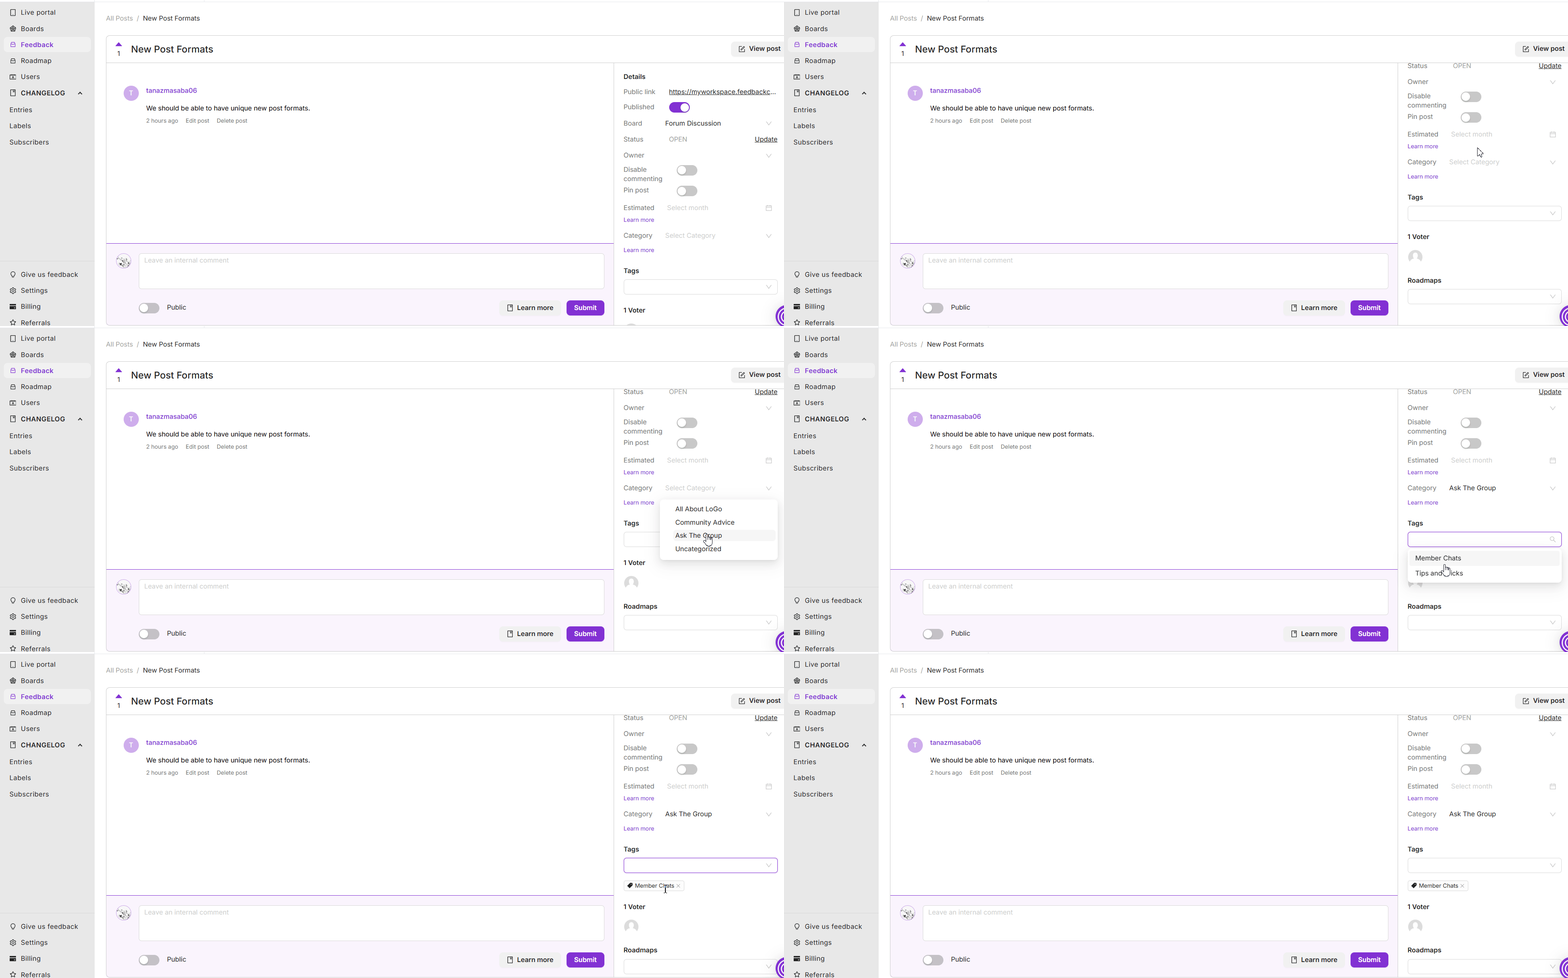
Once you have created categories and tags in FeedbackChimp, you can assign posts to these categories and tags by:
- Go to the Feedback tab from your dashboard.
- Click on the Edit icon next to the post you want to assign to a category.
- In the post editor, select the Category option from the right-hand sidebar.
- Choose the appropriate category from the dropdown menu. You can also add the post to a subcategory by clicking on the expand icon.
- For assigning tags, click on the Tags option from the right-hand sidebar and select all the appropriate tags for the post.
5. Switching a Post from One Board to Another
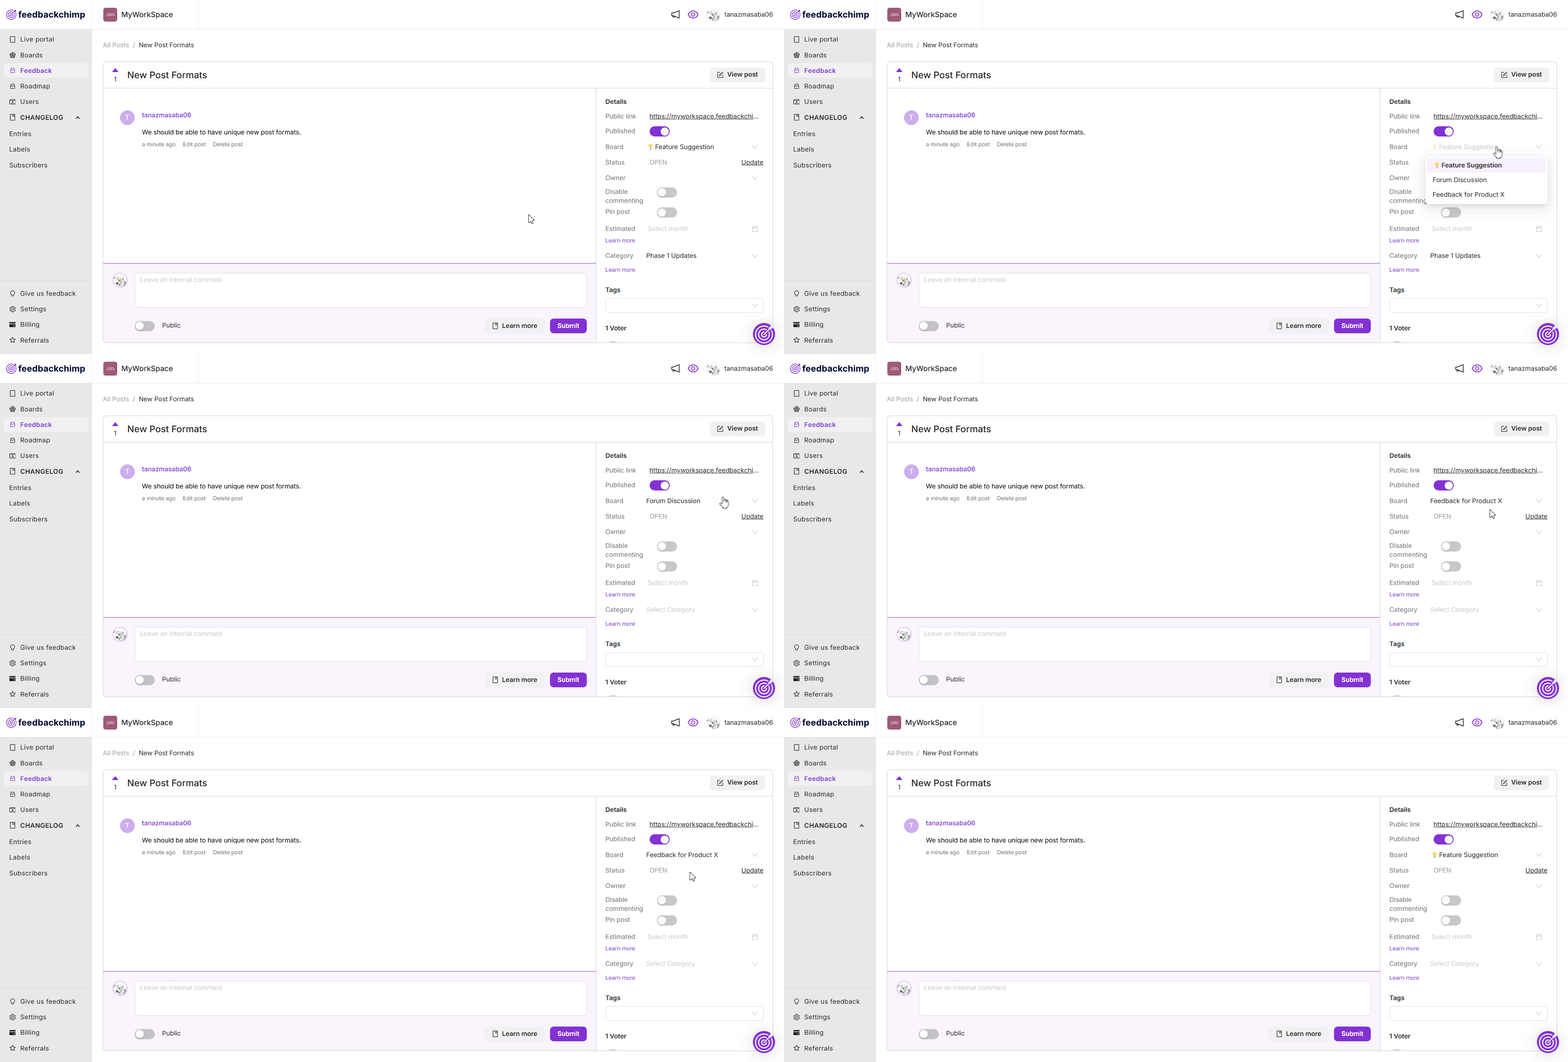
If needed, you can reassign a post from one board to another:
- In the Feedback tab, click on the Edit icon next to the post you want to move.
- Select the desired board from the Board dropdown list in the post editor.
- Save your changes.
6. Post Statuses
Post statuses help communicate the progress of feedback. FeedbackChimp provides various statuses such as Planned, In Progress, and Completed to indicate the development stage of each post.
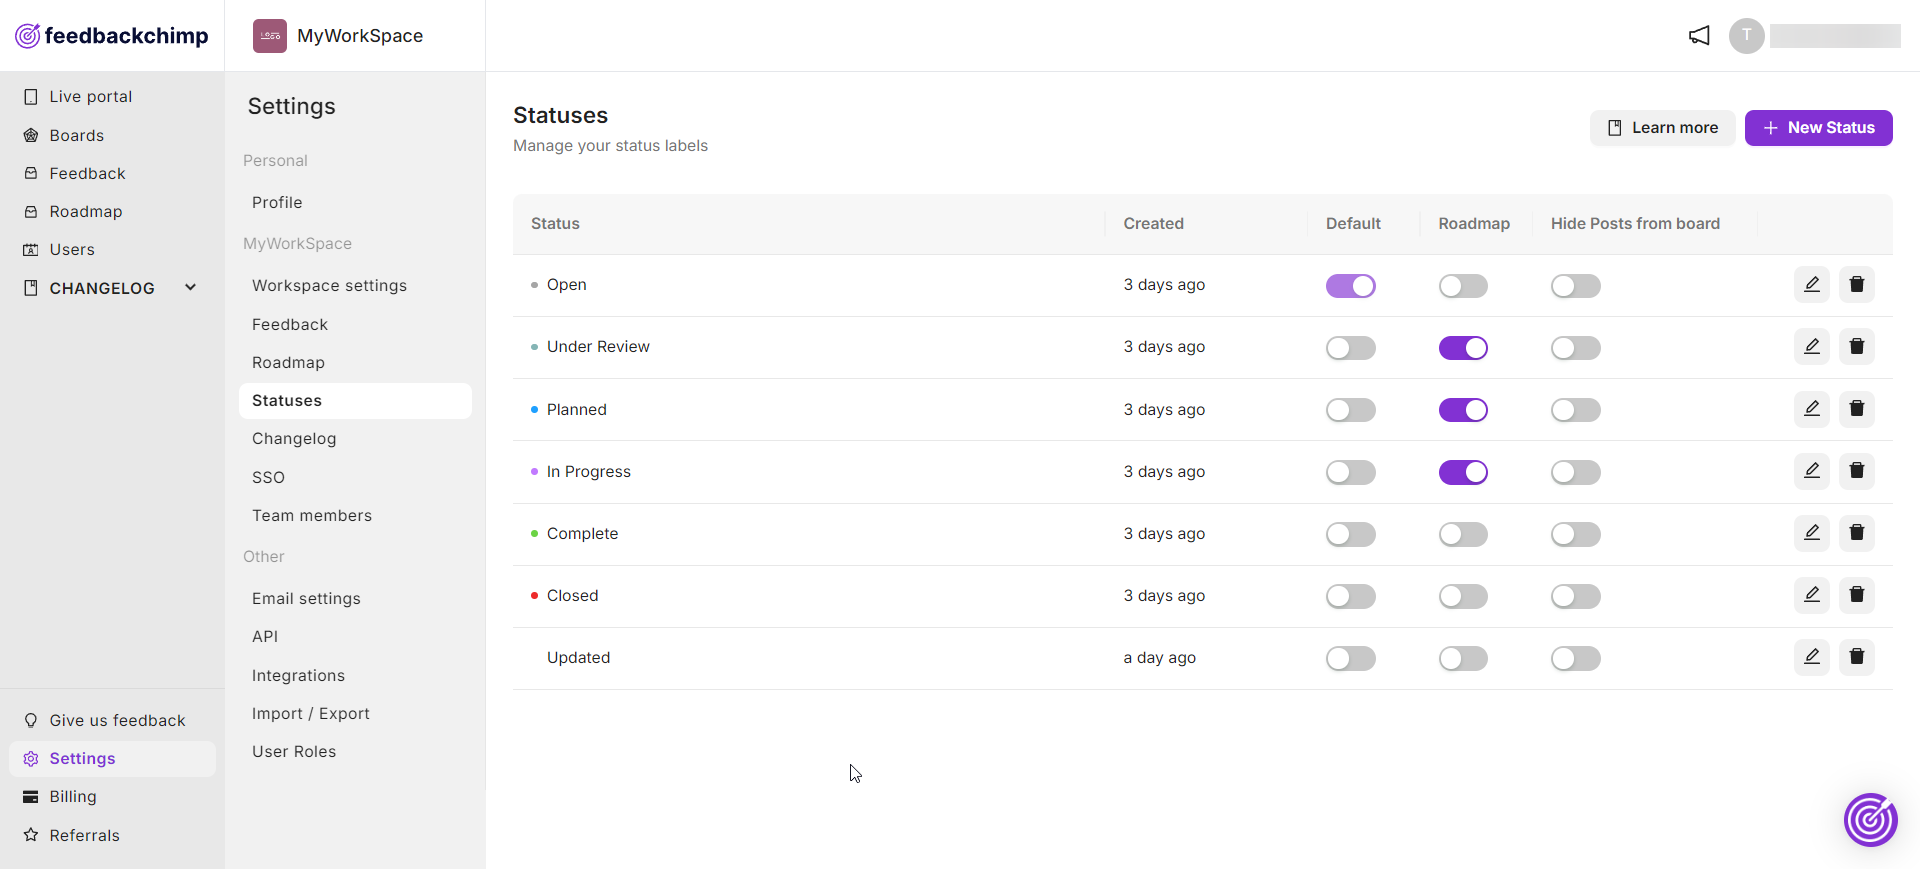
For more details, refer to the Post Statuses documentation.
7. Creating Custom Post Statuses
You can create custom post statuses to align with your team’s workflow:
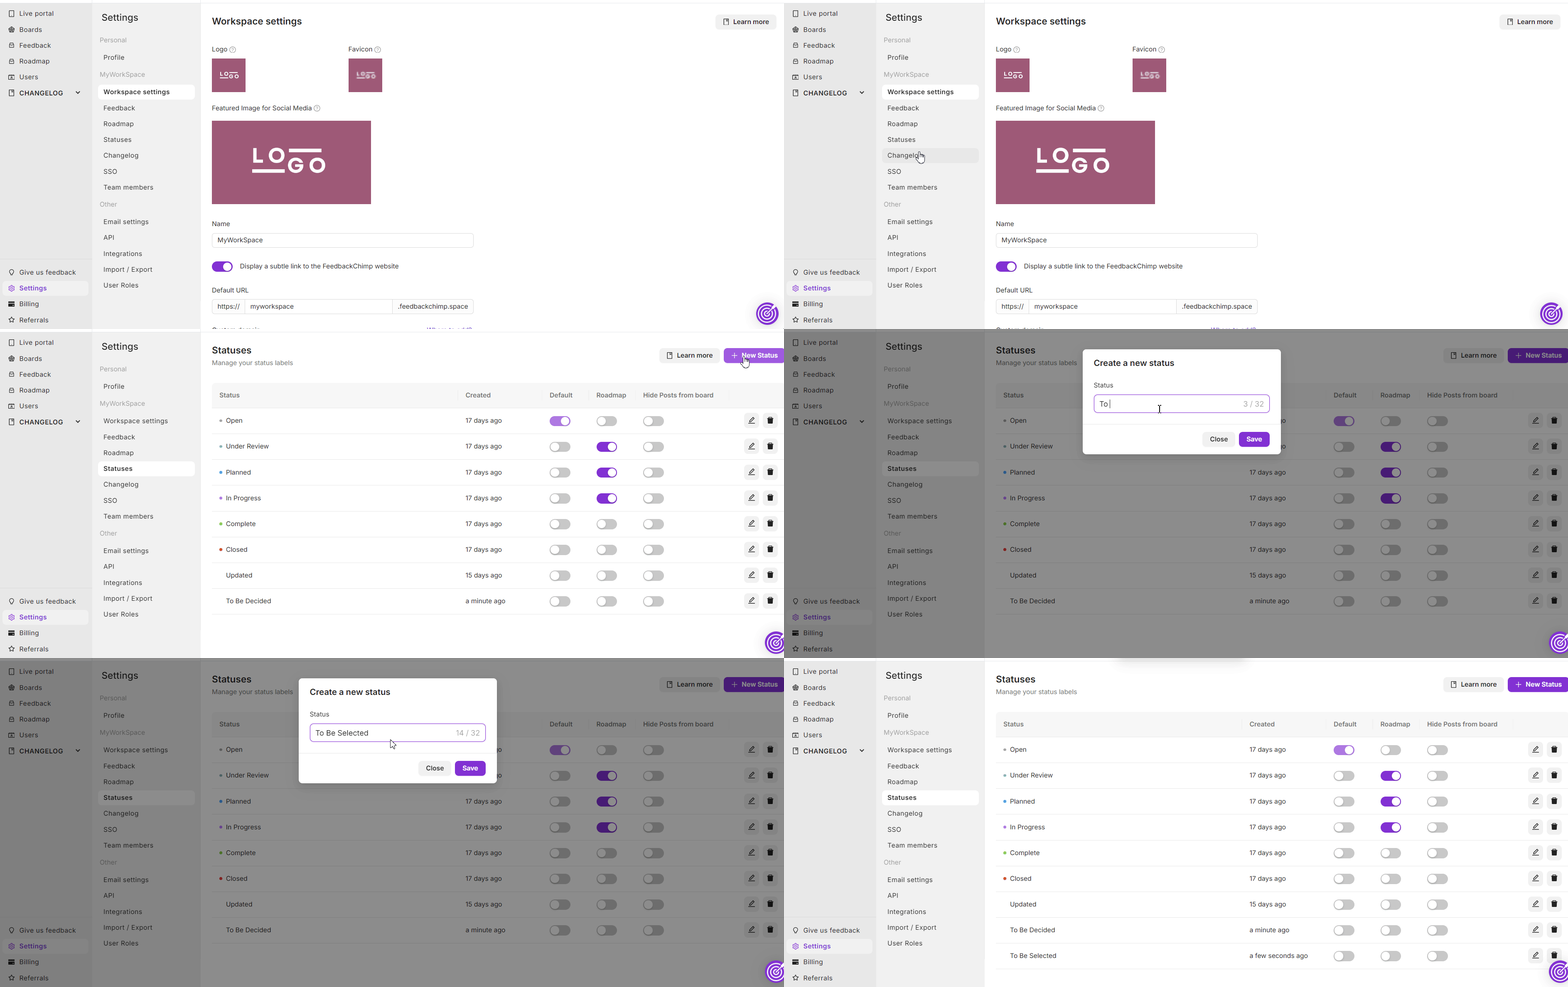
- Navigate to Settings → Statuses.
- Click on the + New Status button
- Enter the Status Name.
- Click Save.
8. Adding ETA to Posts
To add an estimated completion date (ETA) to a post:
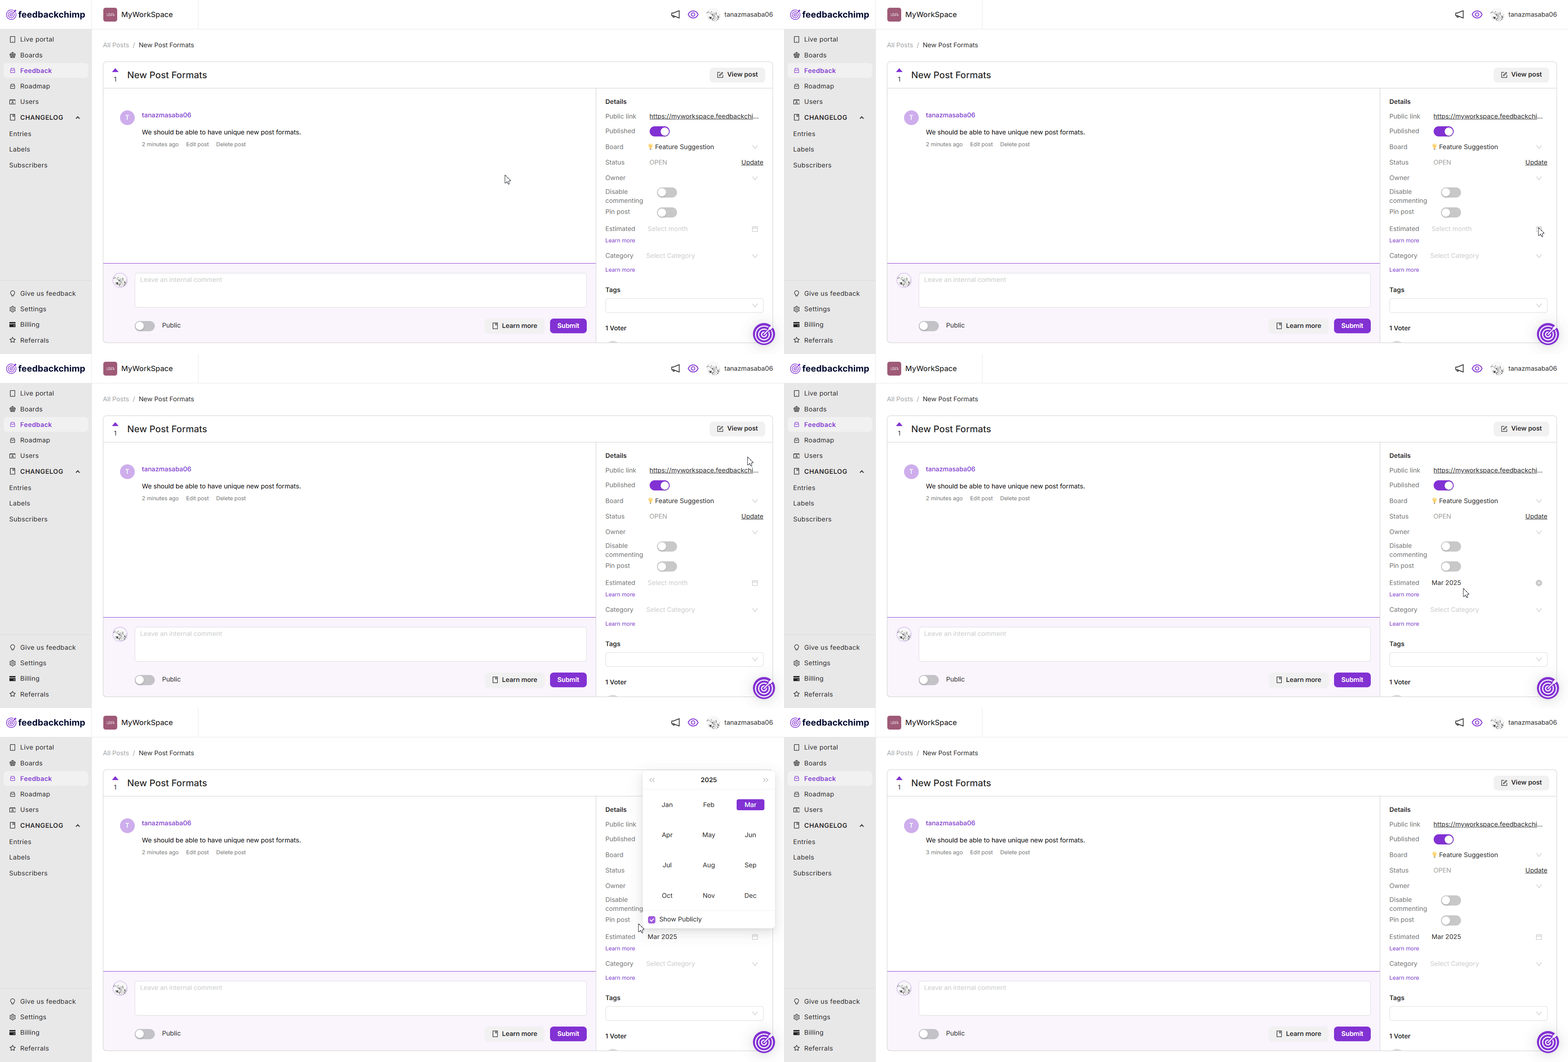
- Open the Feedback tab, find and click the Edit icon for the post.
- In the right sidebar, select Estimated to set the target completion date.
- (Optional) You can also choose to keep the Estimated date hidden or public by ticking the 'Show Publicly' checkbox.
9. Pinning a Post in FeedbackChimp
Pinning posts helps highlight important feedback at the top of a board:
- In the Feedback tab, click the Edit icon next to the post you want to pin.
- Enable the Pin Post option from the sidebar.
For further instructions, see How to Pin a Post in FeedbackChimp.
10. Exporting or Importing Posts in FeedbackChimp
FeedbackChimp supports both importing and exporting post data:
- Importing:
- Go to Settings > Import/Export, click Import Data, and follow the prompts to upload data from compatible platforms (Canny, Upvotly, Nolt, and Featurebase) or import via a CSV file.
- For details, see Importing Posts in FeedbackChimp.
- Exporting:
- Navigate to Settings > Import/Export and click on Export Data to download posts as a CSV file.
- See Exporting Posts from FeedbackChimp for more information.
These features allow you to manage posts efficiently, keeping your feedback organized and accessible.
For further assistance or questions, please reach out to Customer Support.
