FeedbackChimp allows you to import posts from other platforms or from a CSV file. This feature is helpful if you are migrating feedback from platforms like Canny, Upvotly, Nolt, or Featurebase, or if you want to upload a large number of posts quickly.
How to Import Posts
Follow these steps to import posts into FeedbackChimp:
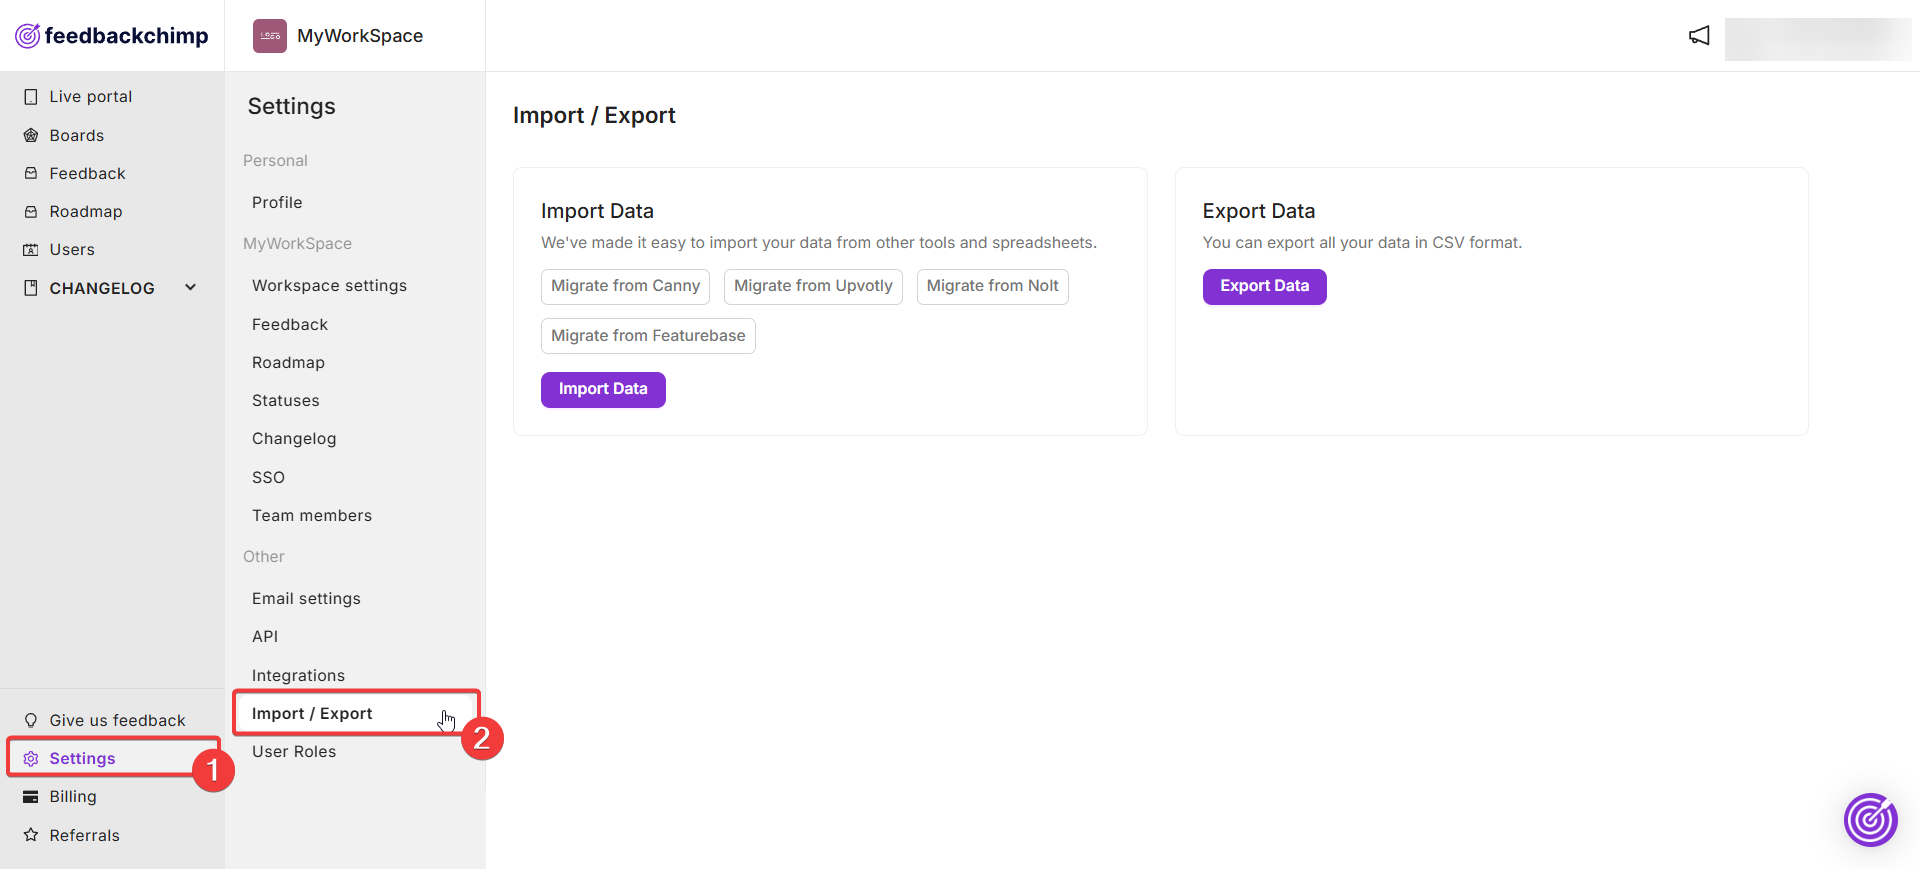
Step 1: Access Import/Export Settings
- Log in to FeedbackChimp: Go to your FeedbackChimp dashboard.
- Navigate to Settings: Click on the Settings tab in the main menu.
- Select Import/Export: From the Settings menu, choose the Import/Export option.
Step 2: Choose the Import Method
- Import from Supported Platforms:
- You can directly migrate data from platforms like Canny, Upvotly, Nolt, and Featurebase.
- Choose the platform you want to migrate from and follow the on-screen instructions.
- Manual CSV Import:
- Click on the Import Data button.
- Upload a CSV file containing your posts.
- Manage the imported data by updating the post statuses correctly and mapping the posts to the right boards.
- Click on 'Start Importing' to import the data.
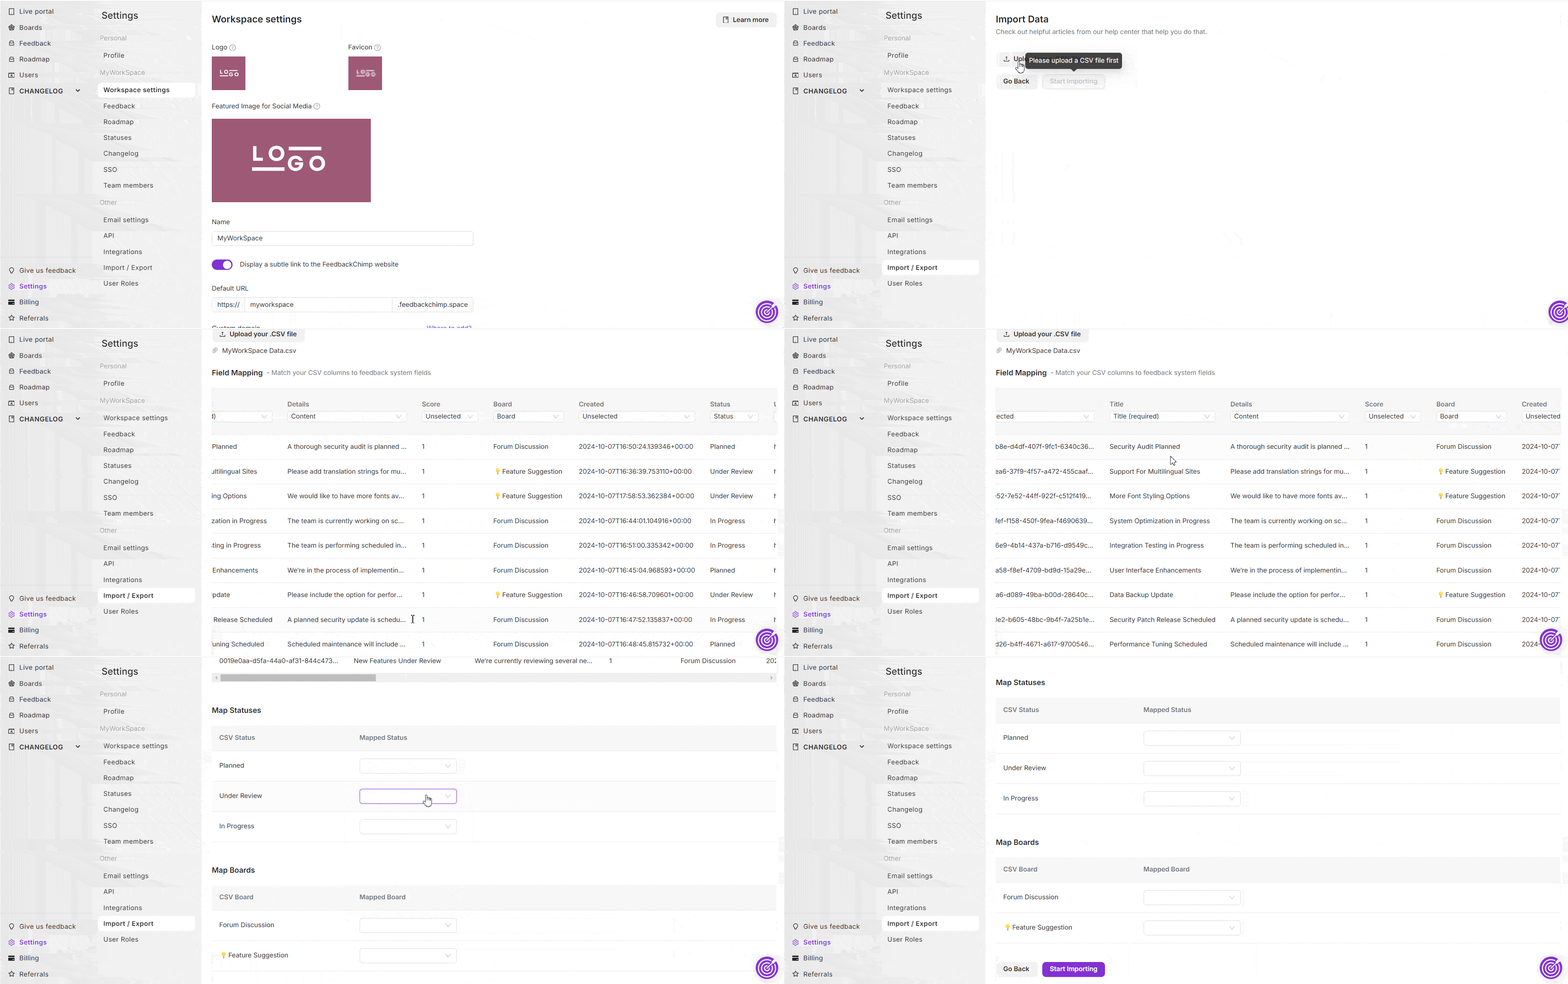
💡 Important Information
When using the Manual CSV Import option, you will need to align the columns from your CSV file (e.g., titles, descriptions, statuses, votes, and comments) with the corresponding fields in FeedbackChimp. Further instructions are given below.
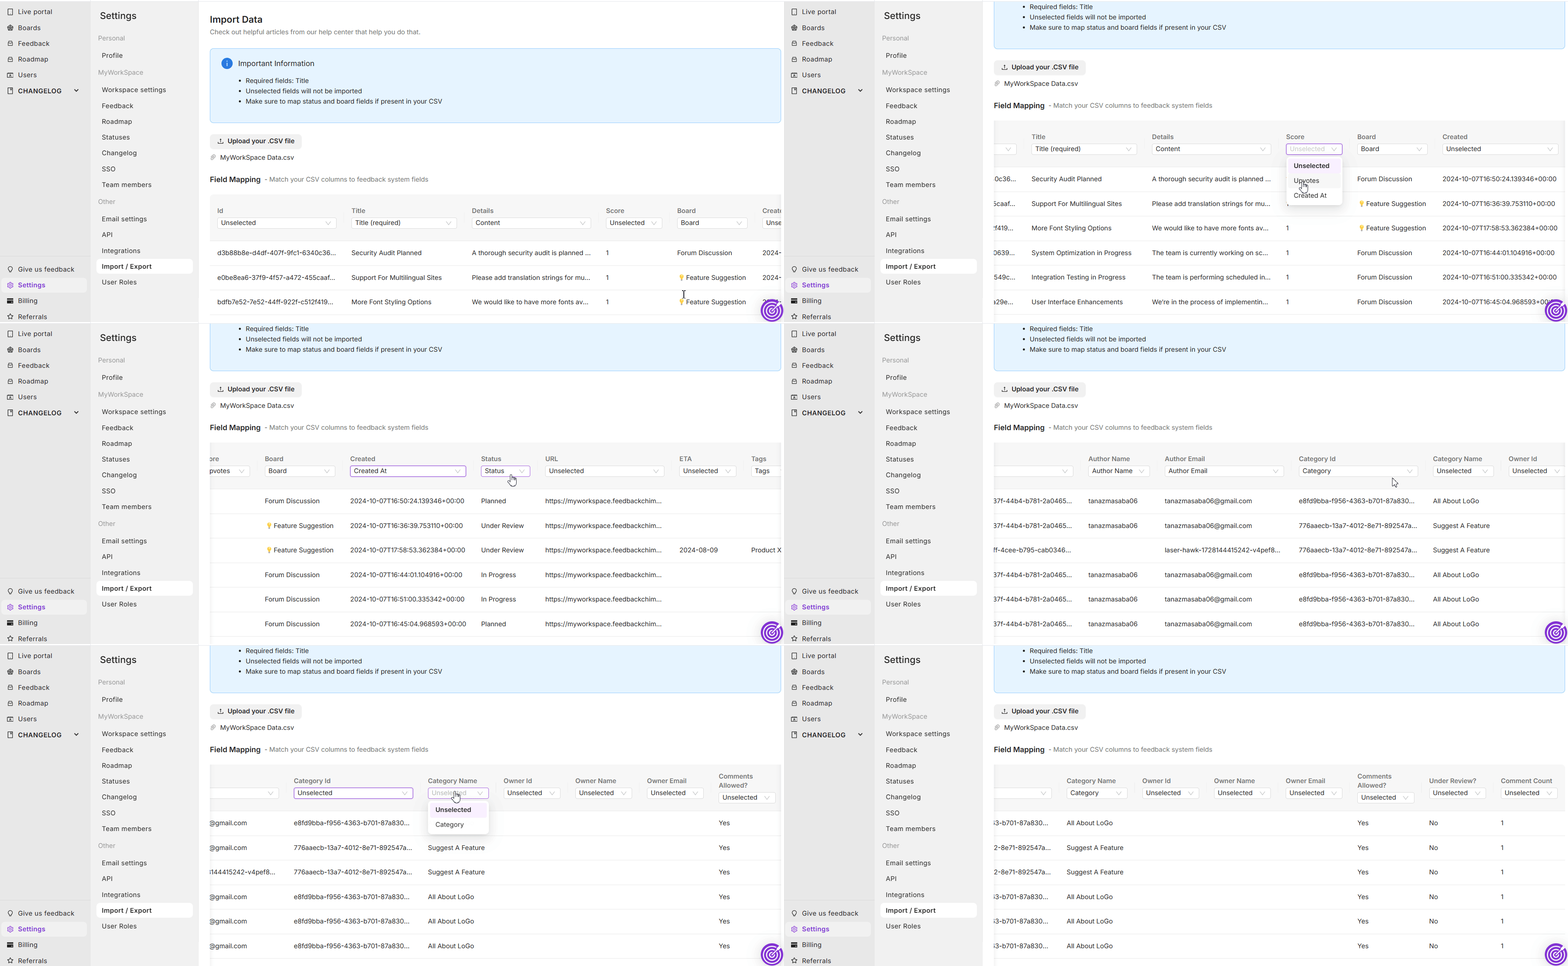
Field Mapping
Here, you can map the columns in your CSV file to different fields in FeedbackChimp.
- Title: Map the titles of your feedback to the Title field in FeedbackChimp.
- Content: Map the description of your feedback to the Content field in FeedbackChimp. Depending on how your CSV file is formatted, this column in your CSV file may be titled as 'Details' or 'Description'.
- Upvotes: In your CSV file, you may have votes on your feedback in a column named 'Score'. Map this to 'Upvotes' in FeedbackChimp.
- Board: Map the board your feedback belongs to the Board field in FeedbackChimp.
- Created At: Map the date on which your feedback was created into the Created At field in FeedbackChimp.
- Status: Map the status of your feedback to the Status filed in FeedbackChimp.
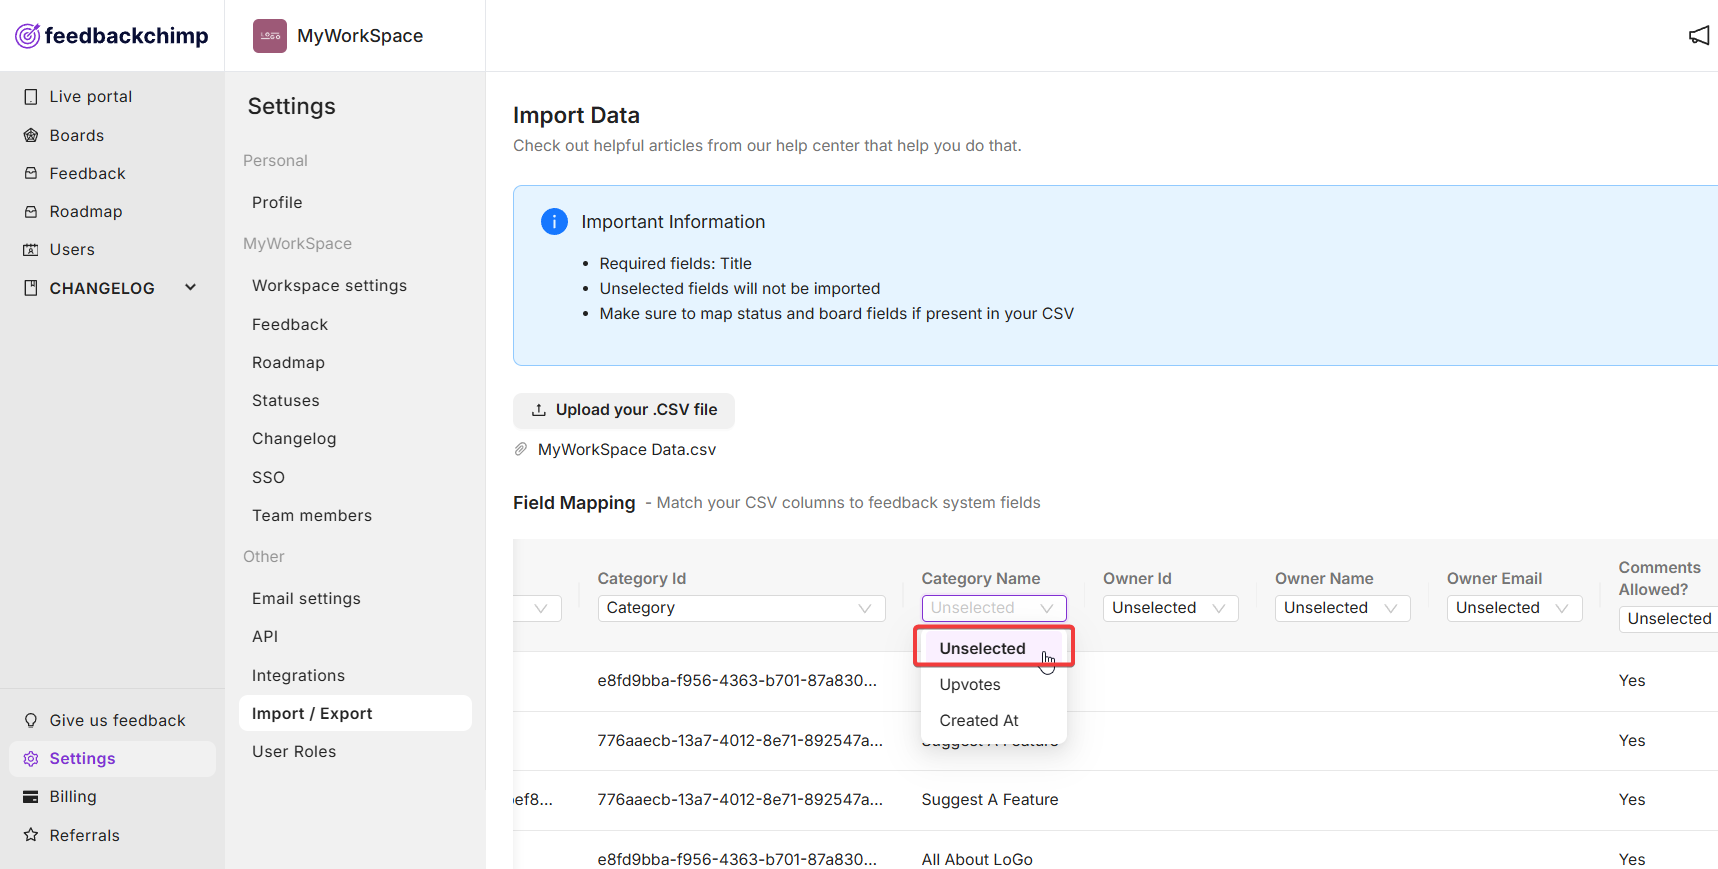
There may be many other fields to map such as for Categories, Tags and Author names. The exact number of fields and field labels will depend on your CSV file and how it is formatted. You can always choose 'Unselected' if you do not wish to import a particular column in your CSV file.
Map Statuses
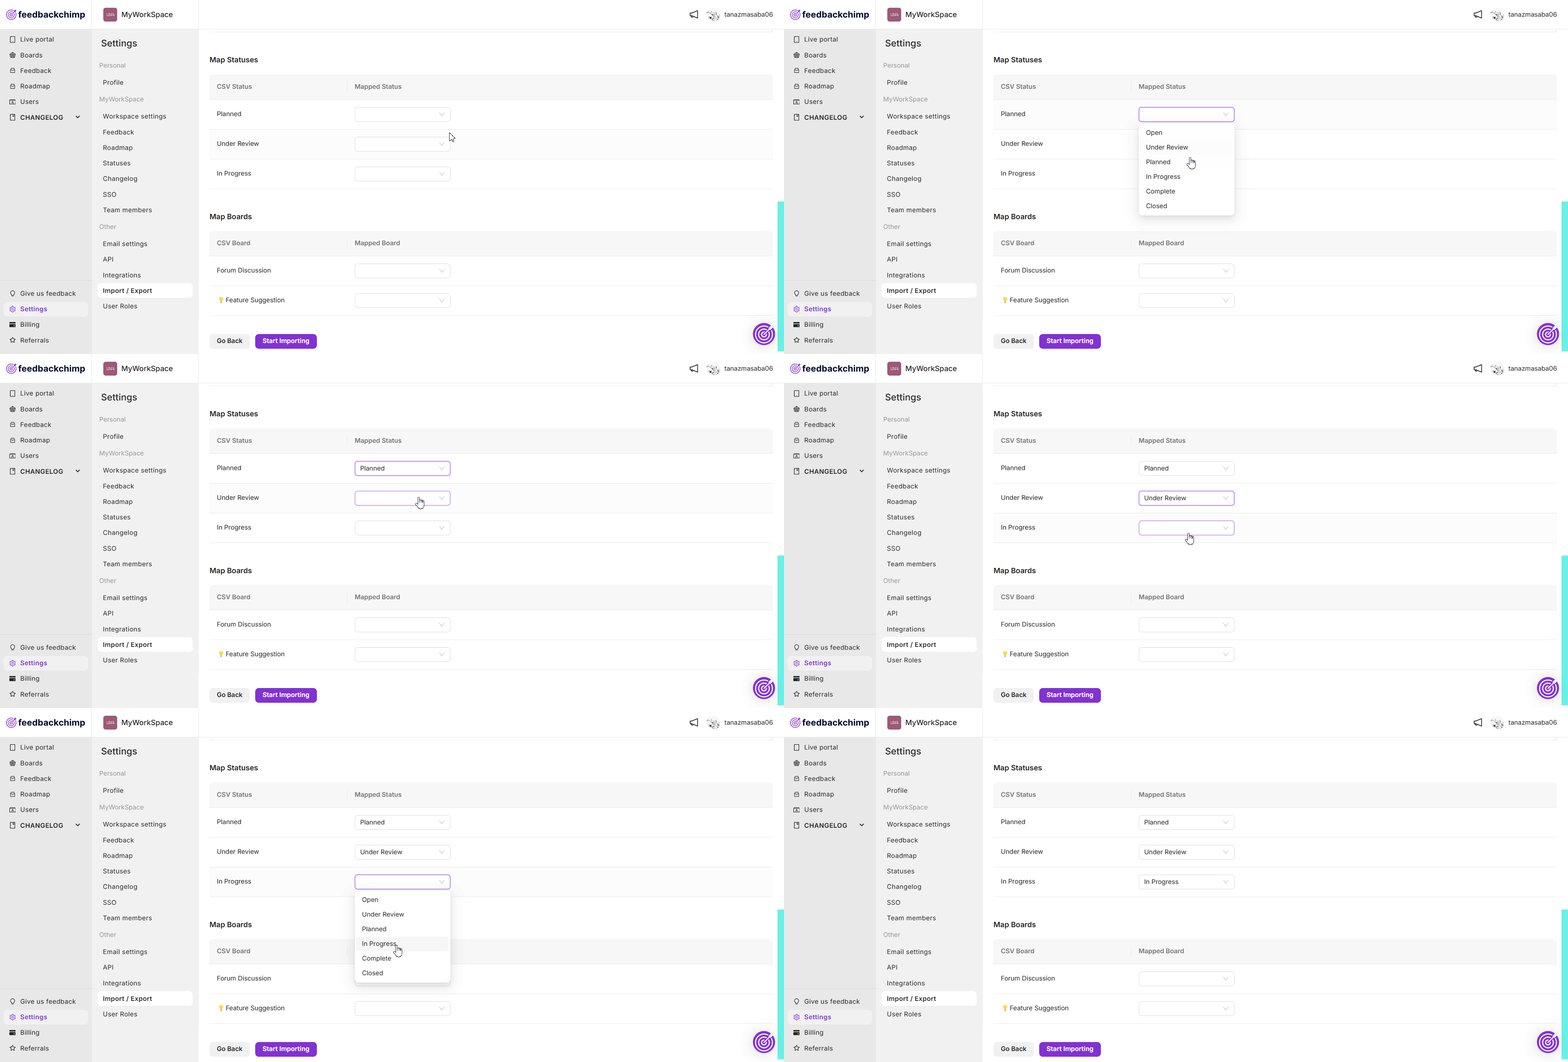
Here, you can map the correct status of an existing feedback in your CSV file to an existing status in FeedbackChimp.
For example, in the tutorial below, we have 6 different statuses in FeedbackChimp. But our CSV file has 3 statuses. So we need to map the statuses in the CSV file to the most accurately corresponding one in FeedbackChimp.
Map Boards
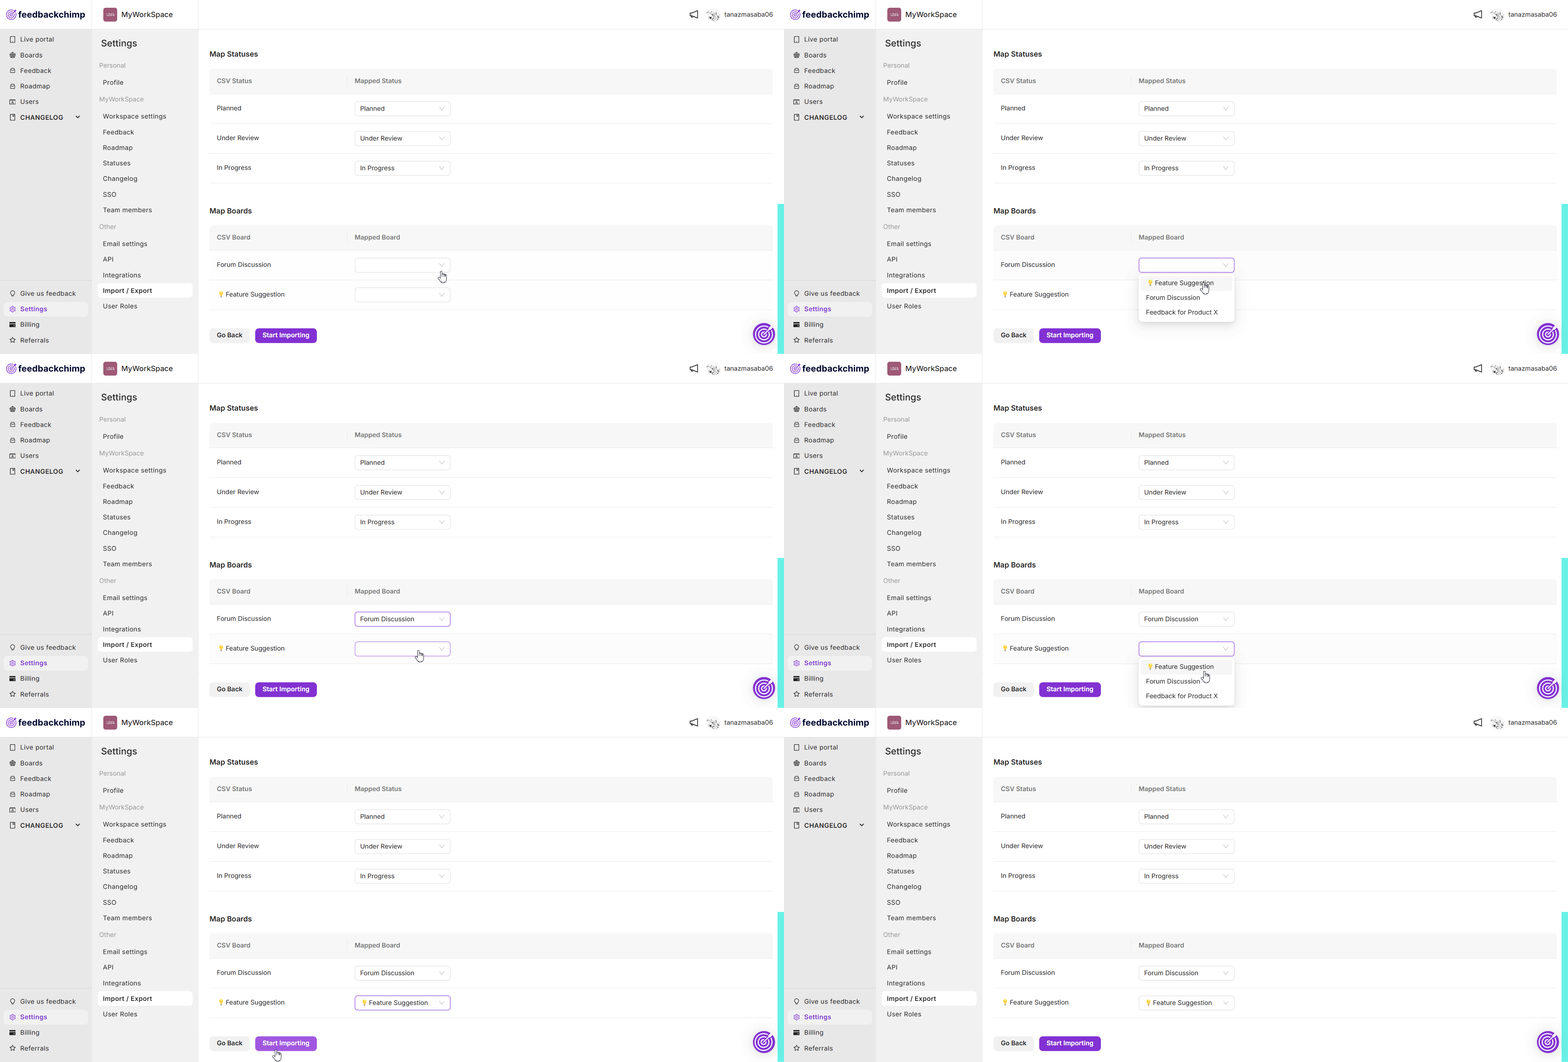
Here, you can map the boards listed in your CSV file to existing boards in FeedbackChimp.
Once you are done mapping the columns from your CSV file with the corresponding fields in FeedbackChimp, click on the Start importing button.
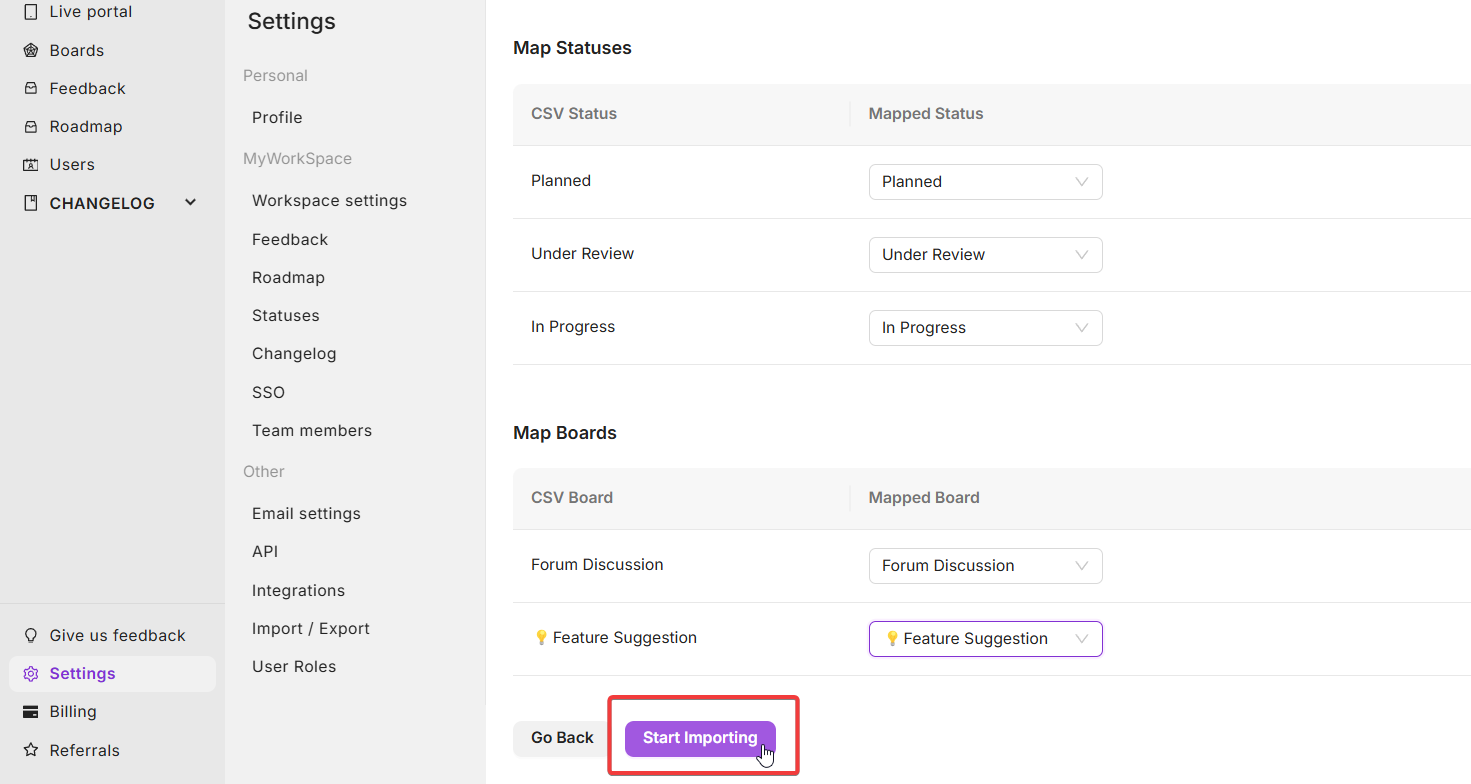
Your data should be imported to FeedbackChimp correctly.

For additional assistance or inquiries, please reach out to Customer Support.
