FeedbackChimp allows you to manage and track the lifecycle of user feedback through Post Statuses. These statuses help you categorize feedback, track progress, and communicate updates with your audience.
Default Post Statuses
You can view the default Post Statuses in FeedbackChimp by navigating to Settings--> Statuses from your dashboard as shown below.
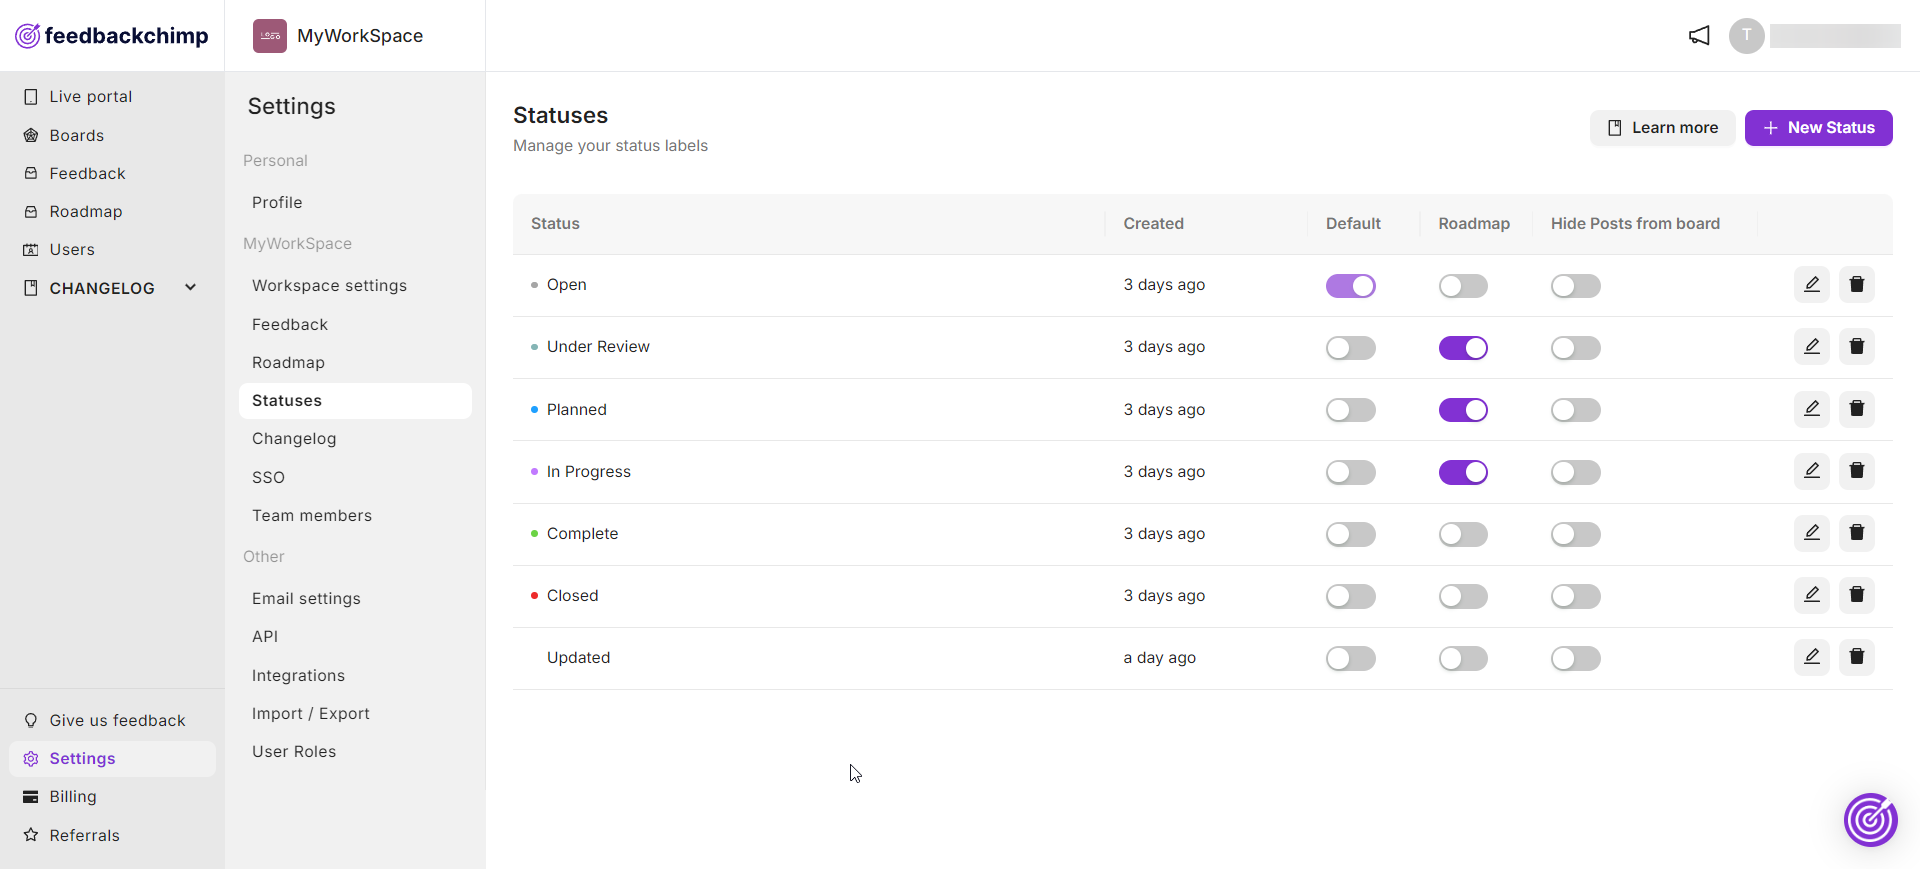
By default, FeedbackChimp provides the following statuses:
- Open: Use this status for newly created posts that require attention. An "Open" status indicates that the feedback has been acknowledged but hasn't been acted upon yet.
- Planned: Mark posts as "Planned" if the feedback has been reviewed and there are plans to implement the suggested changes or features in the future.
- In Progress: When work on a feedback item has started, you can update the status to "In Progress." This helps users know that the suggested changes are actively being worked on.
- Completed: Set posts to "Completed" when the feedback has been fully implemented or the requested changes have been made.
- Closed: Use the "Closed" status for feedback that won't be implemented. This status is useful for declining requests and providing clarity on why a specific suggestion was not pursued.
Custom Post Statuses
In FeedbackChimp, you can also create custom post statuses tailored to your specific workflow. To create a custom status:
- Navigate to Settings → Statuses from your dashboard.
- Click on the + New Status button.
- Enter the name and color for your new status.
- Click Save.
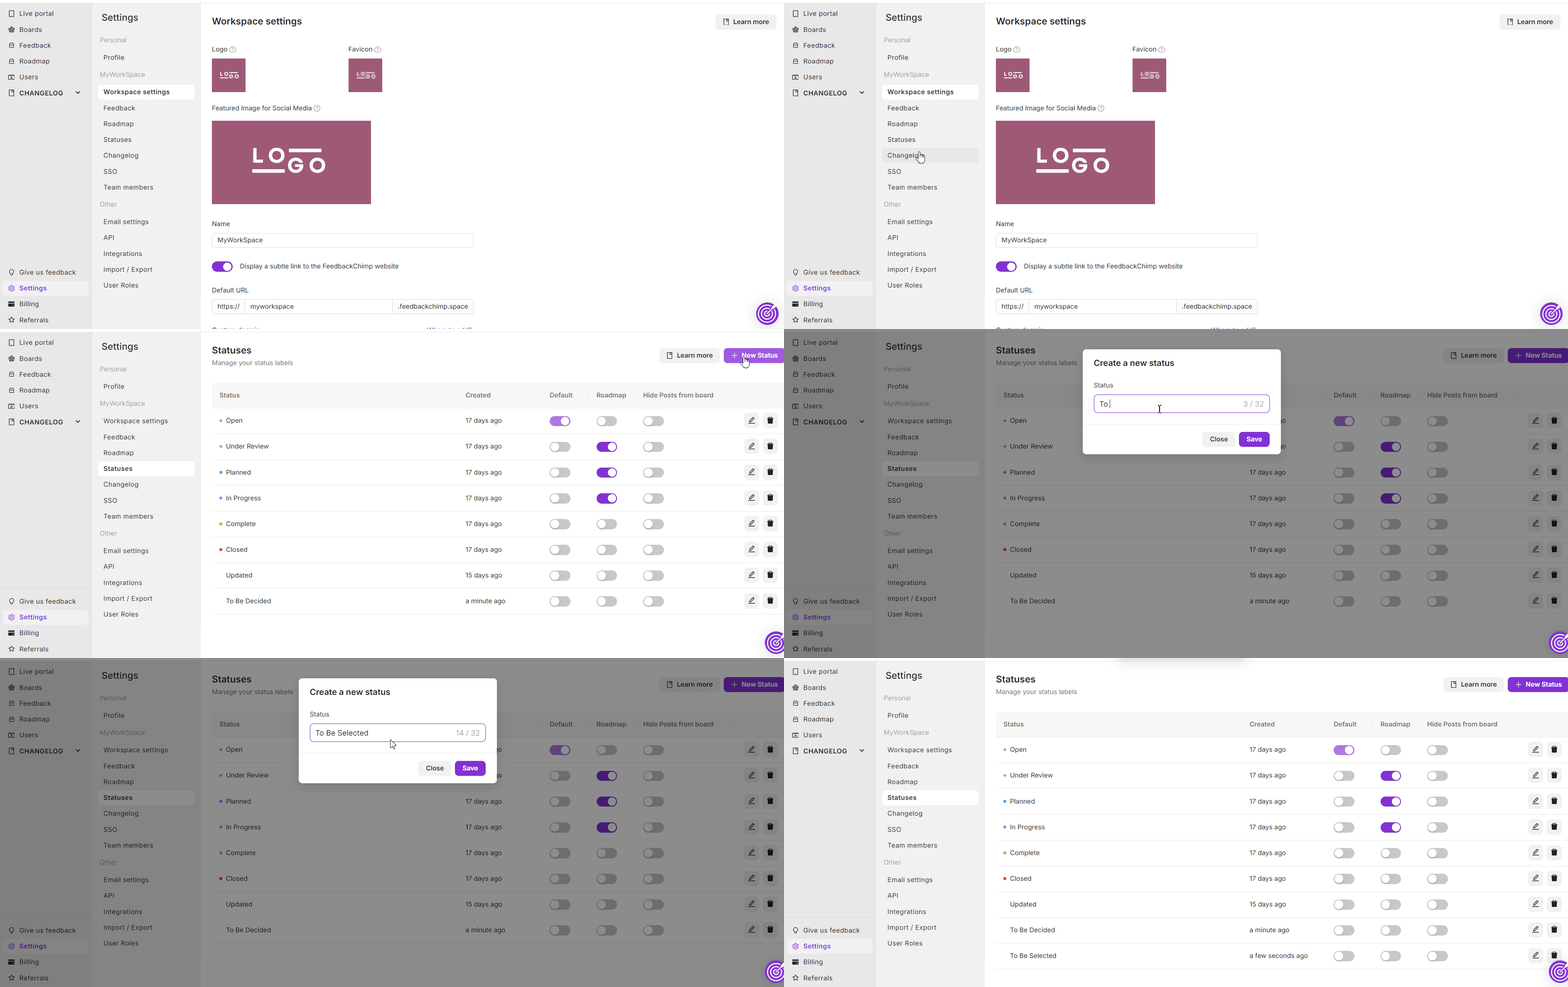
Your new status will be added to the list of available statuses, which you can now apply to posts.
Managing Statuses
In addition to creating custom post statuses, FeedbackChimp also gives you the flexibility to manage your statuses.
Editing an Existing Status
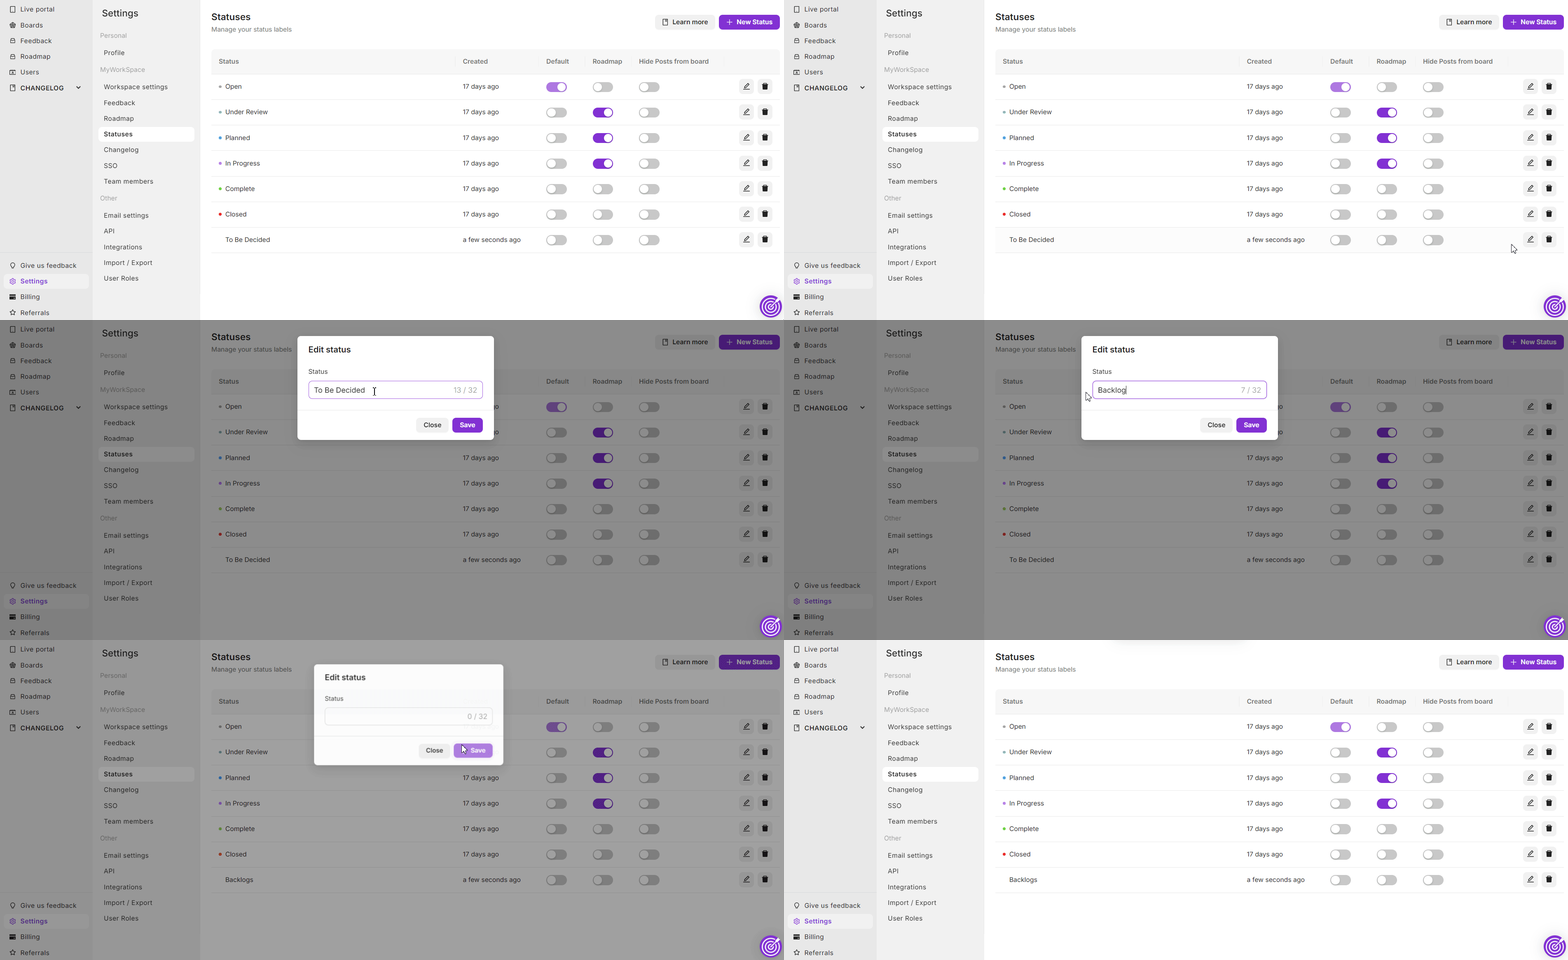
To edit an existing status:
- Go to Settings → Statuses from the dashboard.
- Locate the status you want to update and click on the Edit icon.
- Modify the name of the status as needed, then click Save.
Deleting a Status
To delete a status:
- In the Statuses section, find the status you want to delete.
- Click on the Delete icon next to it.
- Confirm your decision, and the status will be removed.
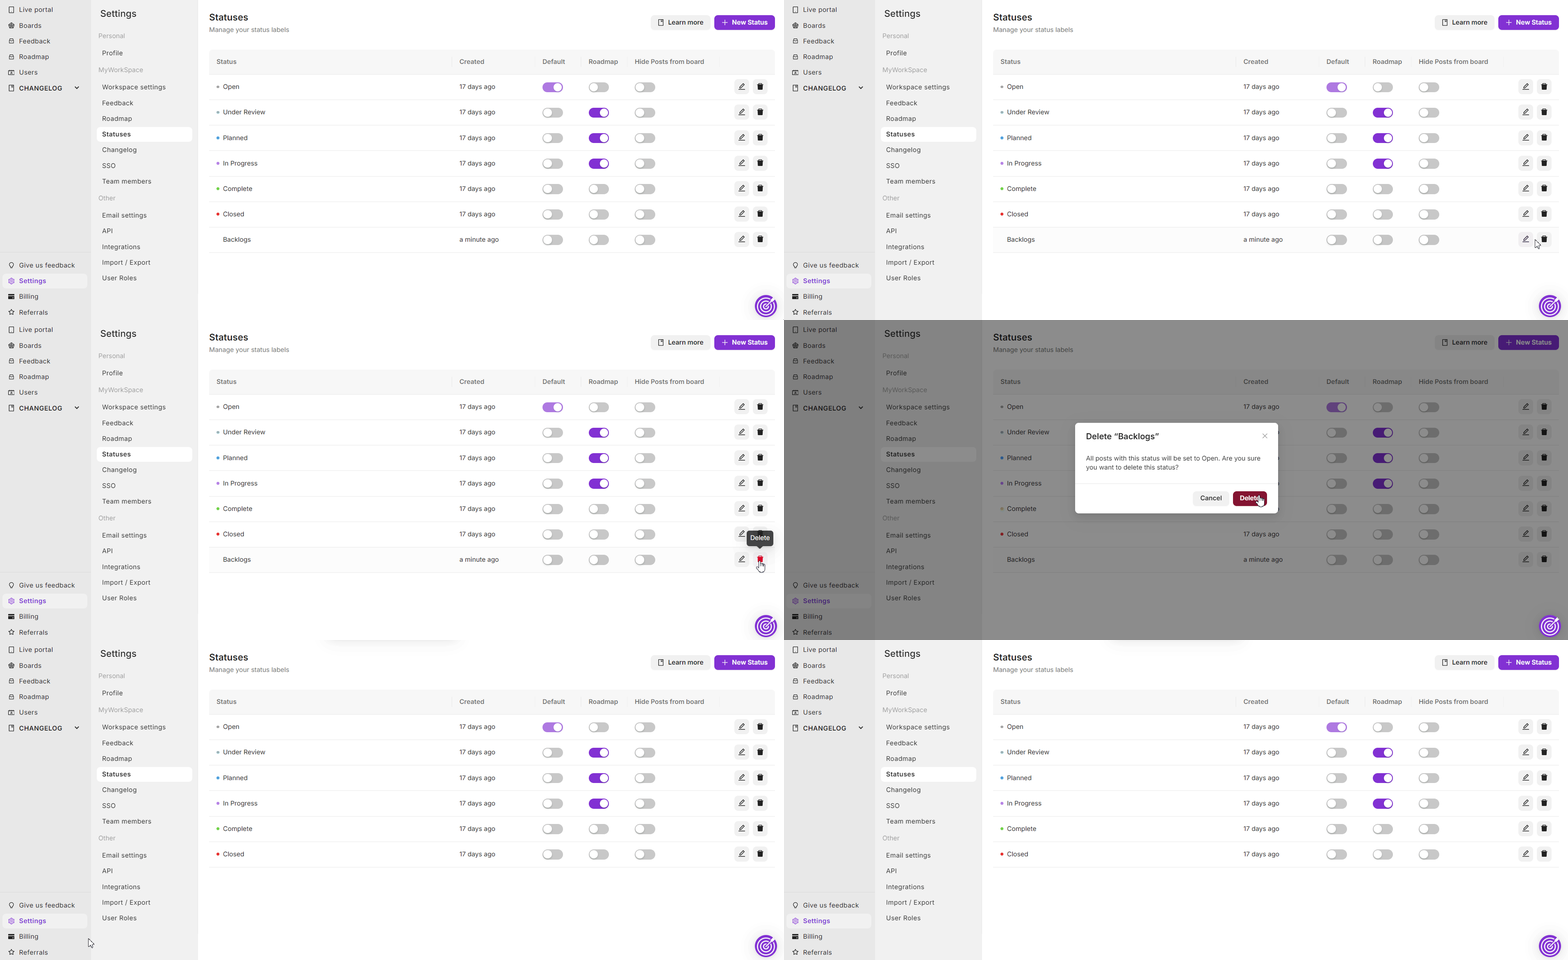
Note: If a status is in use, you may need to reassign affected posts to a different status before deleting.
Using Statuses in Posts
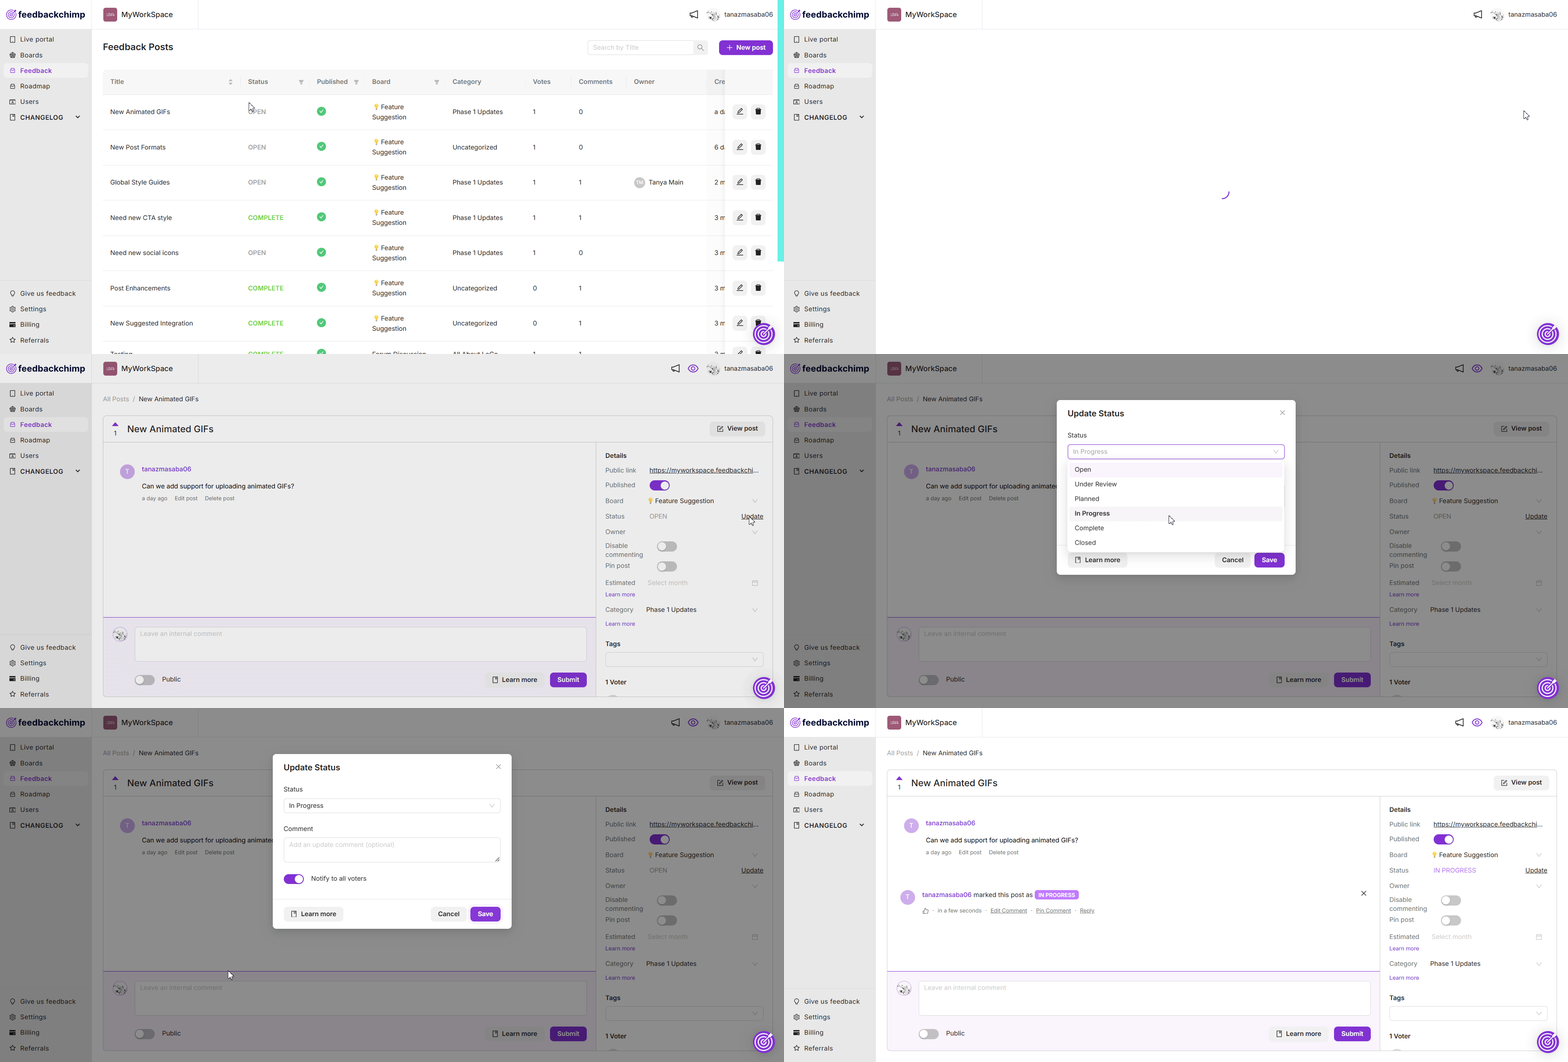
To assign or update a status for a post:
- Navigate to the Posts section from your dashboard.
- Click on the post you want to update.
- From the sidebar on your right, use the Status dropdown menu to select a new status.
- Save your changes, and the status update will be reflected on the post.
Best Practices
- Use Default Statuses for a quick and simple way to manage feedback.
- Create Custom Statuses if your organization has a unique feedback lifecycle that needs additional categories.
- Regularly Update Post Statuses to keep users informed about the progress of their suggestions.
For further assistance or questions, please reach out to Customer Support.
