Categories in FeedbackChimp help you organize and structure posts within your feedback boards. By grouping similar topics, ideas, or suggestions under defined categories, you can streamline navigation for users, making it easier to find relevant posts. Categories are customizable and can be tailored to suit your product’s specific needs, whether organizing by feature, functionality, or area of focus.
Unlike tags, categories are visible to end-users as well as Feedbackchimp admins. A post can only be assigned a single category at a time, whereas multiple tags can be assigned.
Creating & Managing Categories
Follow these steps to create a new category for your feedback board:
- Navigate to the Boards tab from your FeedbackChimp dashboard.
- From the Boards menu, select Categories to access the category management screen.
- Click on the + New Category button.
- Enter a Name for your new category.
- Click Save to create the category.
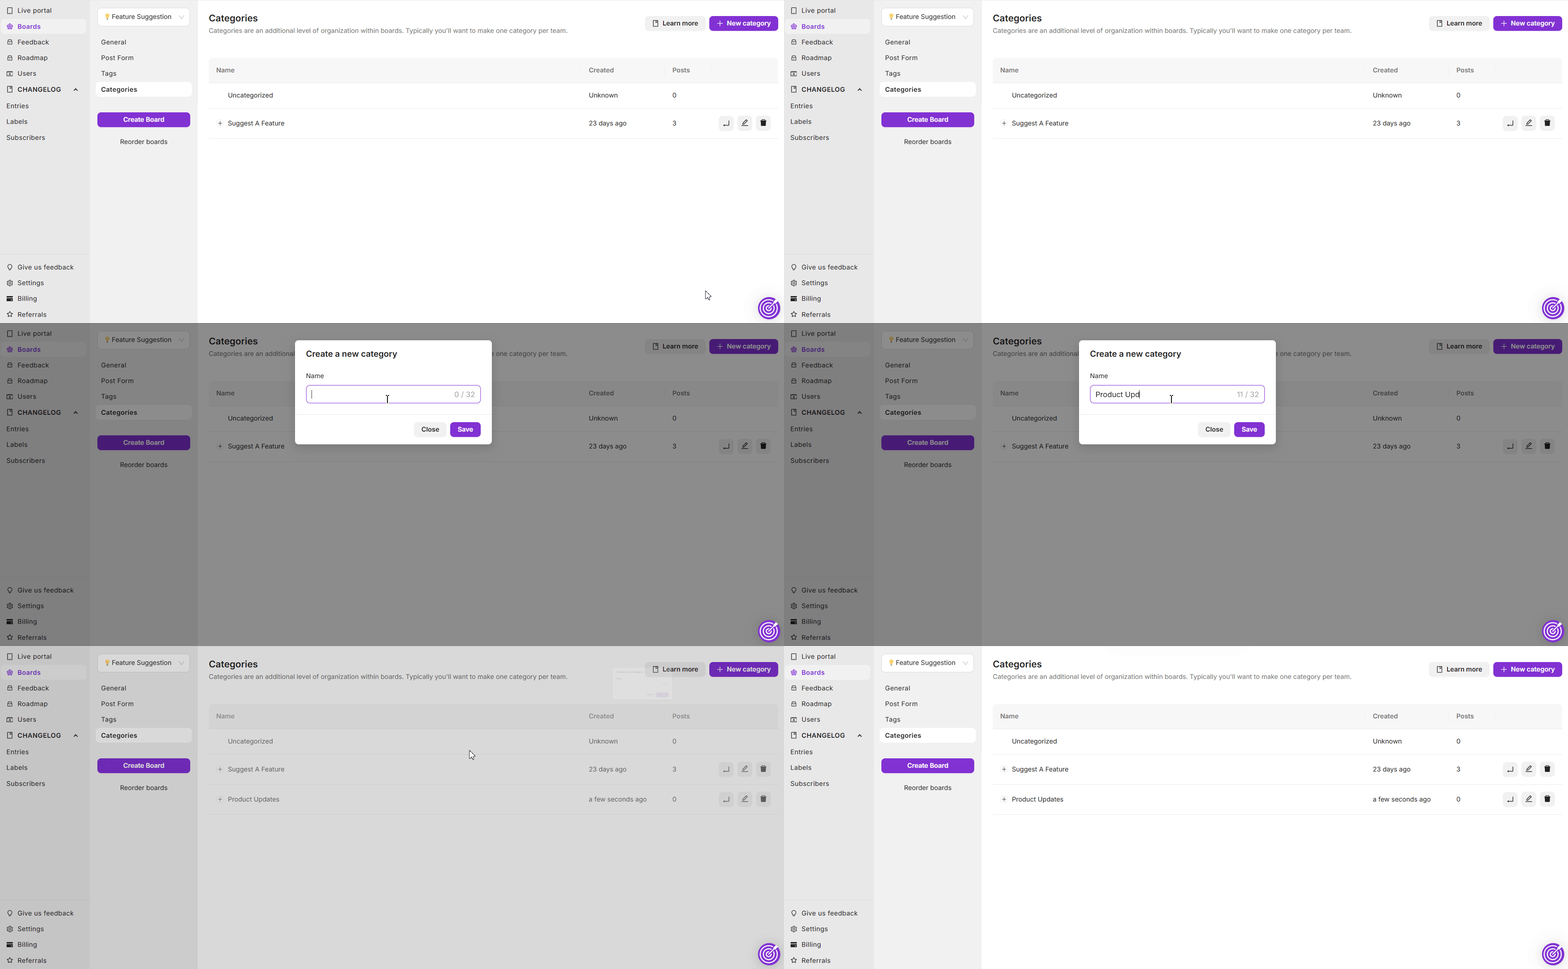
Your new category is now available for use, and users will be able to tag posts under this category to organize feedback efficiently. From here, you can also rename or delete any existing categories by hovering over a category to see the options.
Creating Subcategories
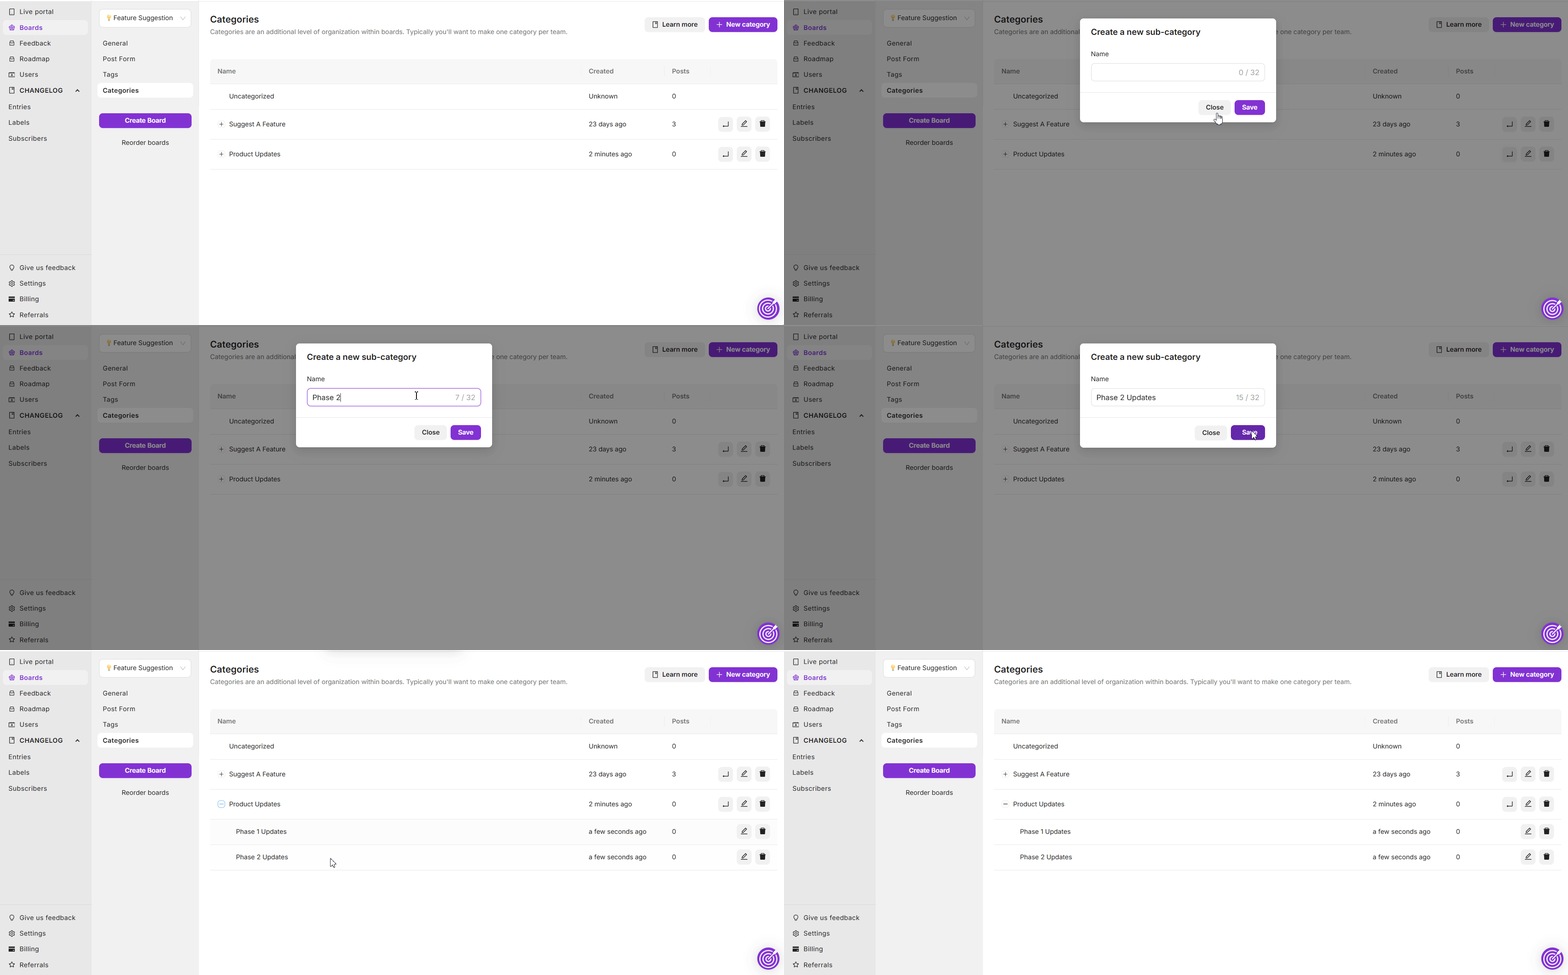
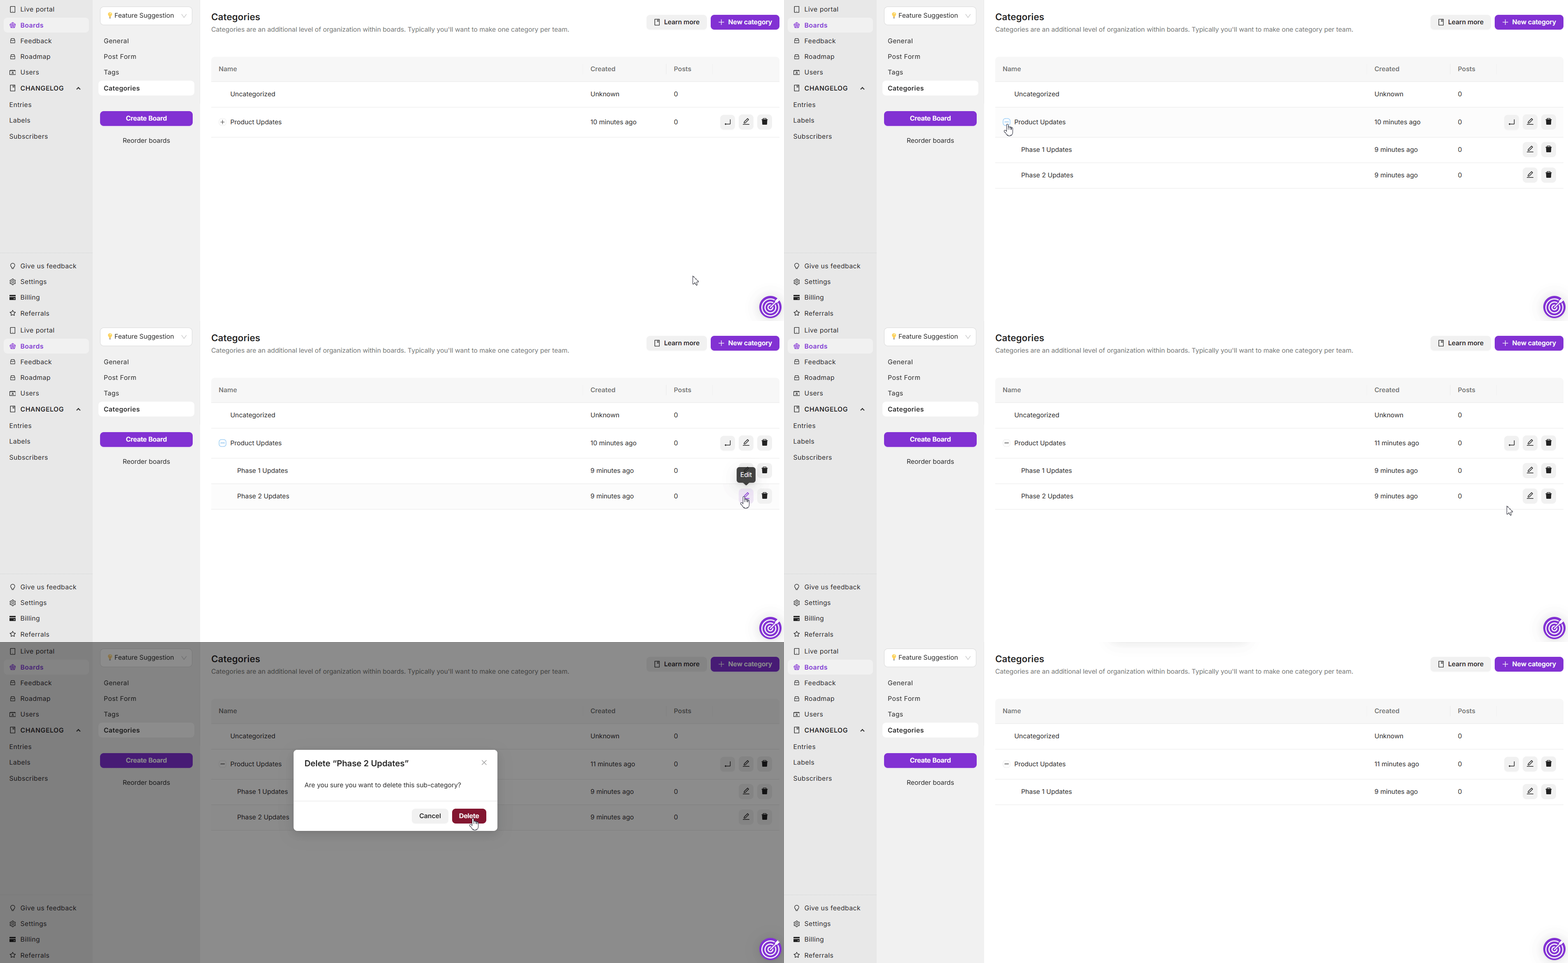
A subcategory is nested within a top-level category. You can click the arrow icon next to a category to create a subcategory.
To view existing subcategories within a category, simply click on the + icon next to the category to expand it and reveal all the subcategories inside it.
Editing and Deleting Categories
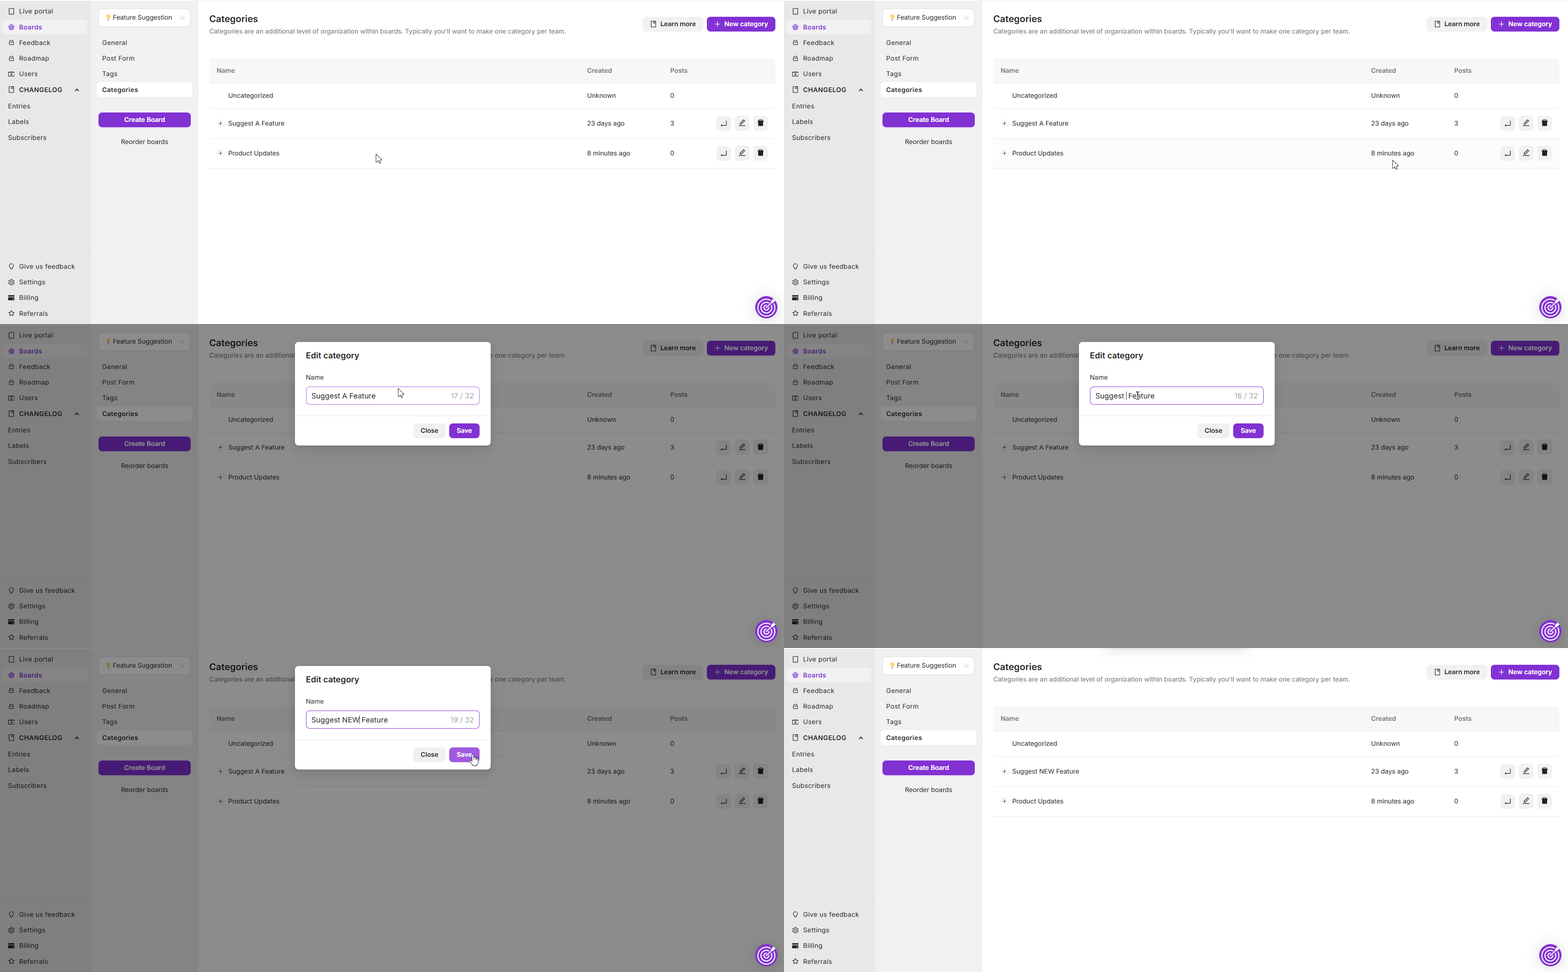
If you need to update or edit a category, follow these steps:
- Go to Boards--> Categories from your dashboard.
- Click on the Edit icon next to the category you want to modify.
- Update the category’s Name as needed.
- Save to apply your changes.
To delete a category, follow these steps:
- Go to Boards--> Categories from your dashboard
- Click on the Delete icon next to the category you want to remove.
- Confirm the deletion to remove the category permanently.
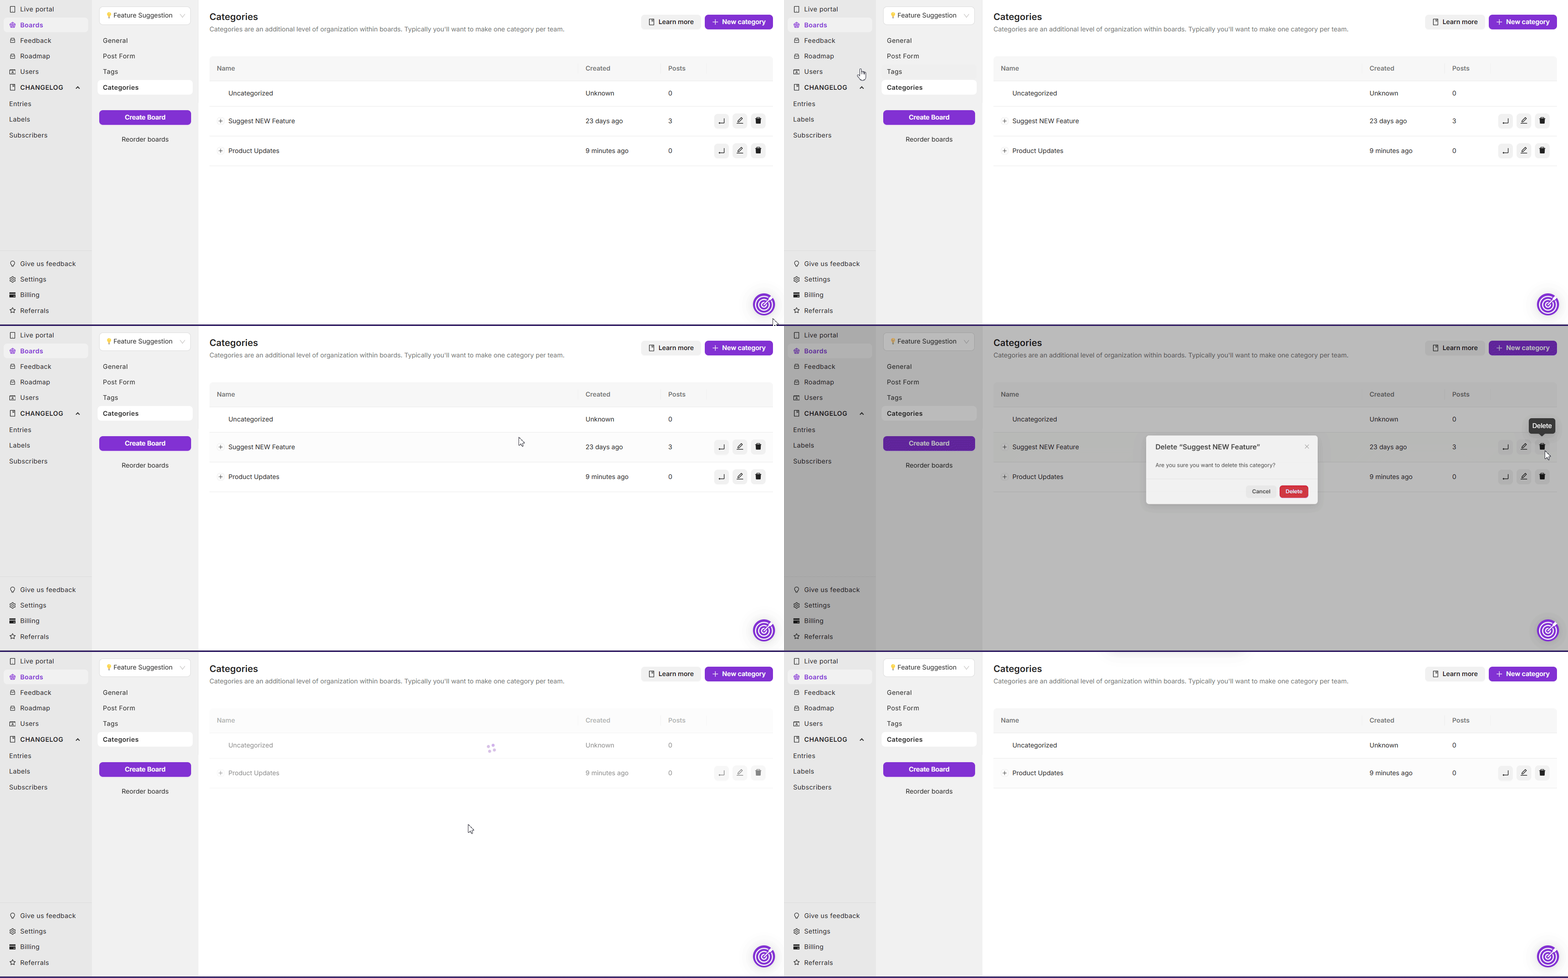
Note: Deleting a category will not delete the posts associated with it; they will simply be uncategorized.
To edit or delete subcategories, follow the same steps as above, except make sure to click on the subcategory itself to edit or remove them.
Assigning Posts to Categories
To assign posts to a category:
- Go to the Feedback tab from your dashboard.
- Click on the Edit icon next to the post you want to assign to a category.
- In the post editor, select the Category option from the right-hand sidebar.
- Choose the appropriate category from the dropdown menu. You can also add the post to a subcategory by clicking on the expand icon.
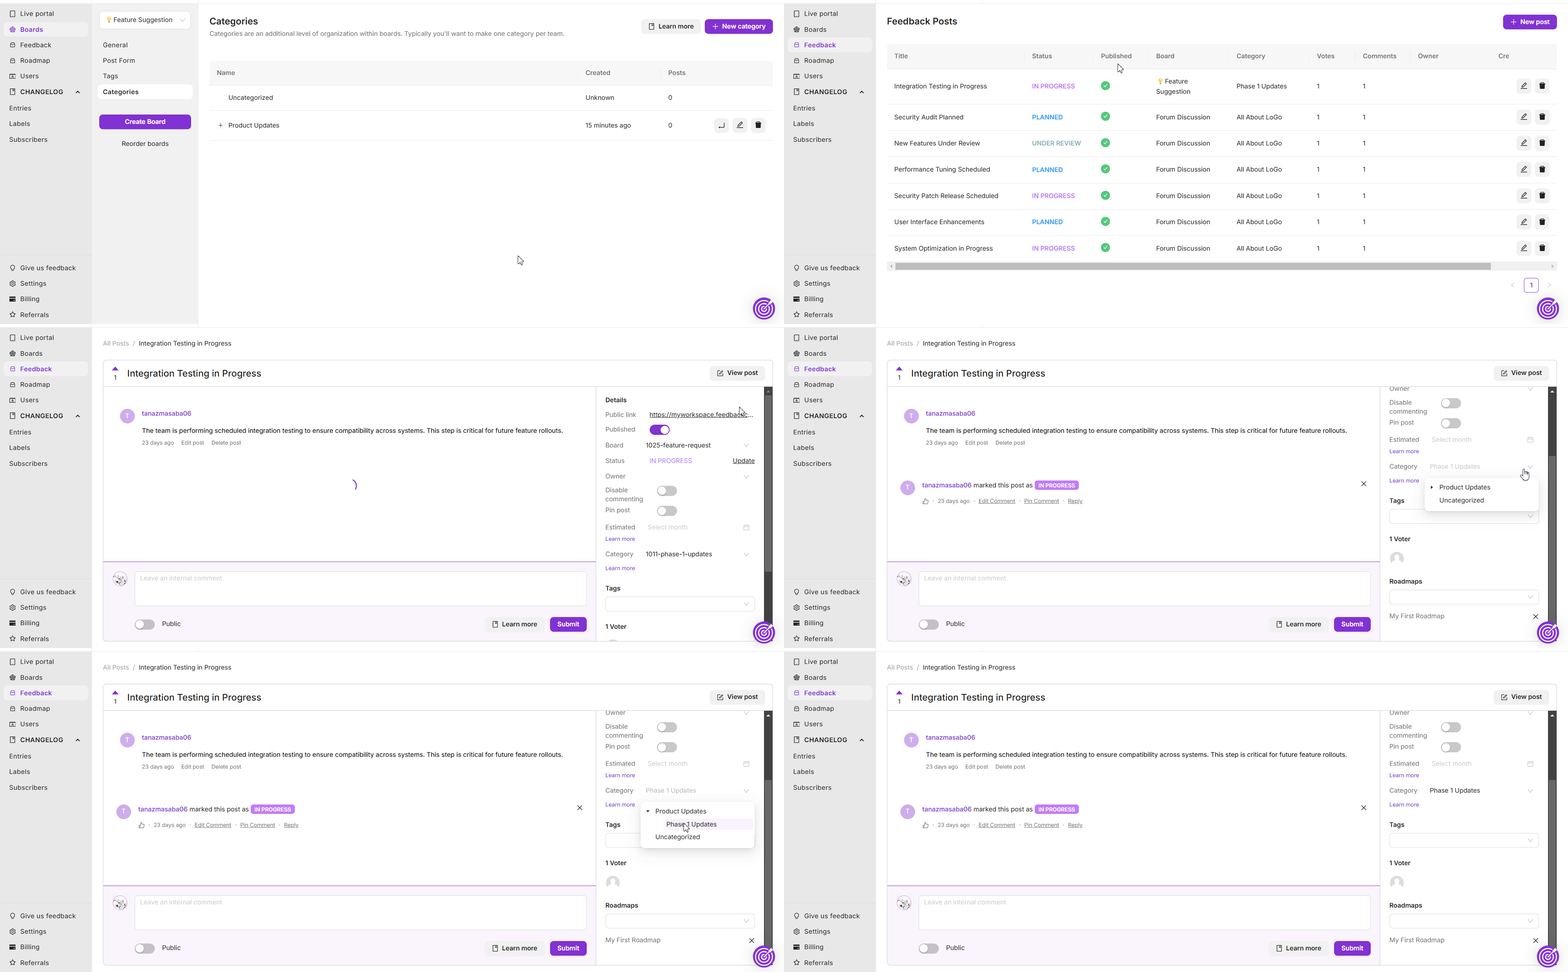
Posts are now grouped under the selected category, allowing users to find similar topics more efficiently.
Tips for Managing Categories
- Create meaningful categories that match your product’s structure to make it easier for users to find and engage with feedback.
- Regularly review categories to ensure they are up-to-date with current features or projects.
Examples of Common Categories
- Feature / Function (e.g., Modules, Billing, Dashboard, etc.)
- Device/OS (e.g., Android, OSX, Desktop Browser, etc.)
- Team (e.g., UI/UX Design, Engineering, Sales, etc.)
For additional assistance or inquiries, please reach out to Customer Support.
