Tags in FeedbackChimp provide a powerful way to categorize and organize feedback, making it easier to manage posts across different boards. Tags help users quickly filter and find relevant posts, enabling efficient prioritization and decision-making.
How to Create a New Tag
Follow these steps to create new tags in FeedbackChimp:
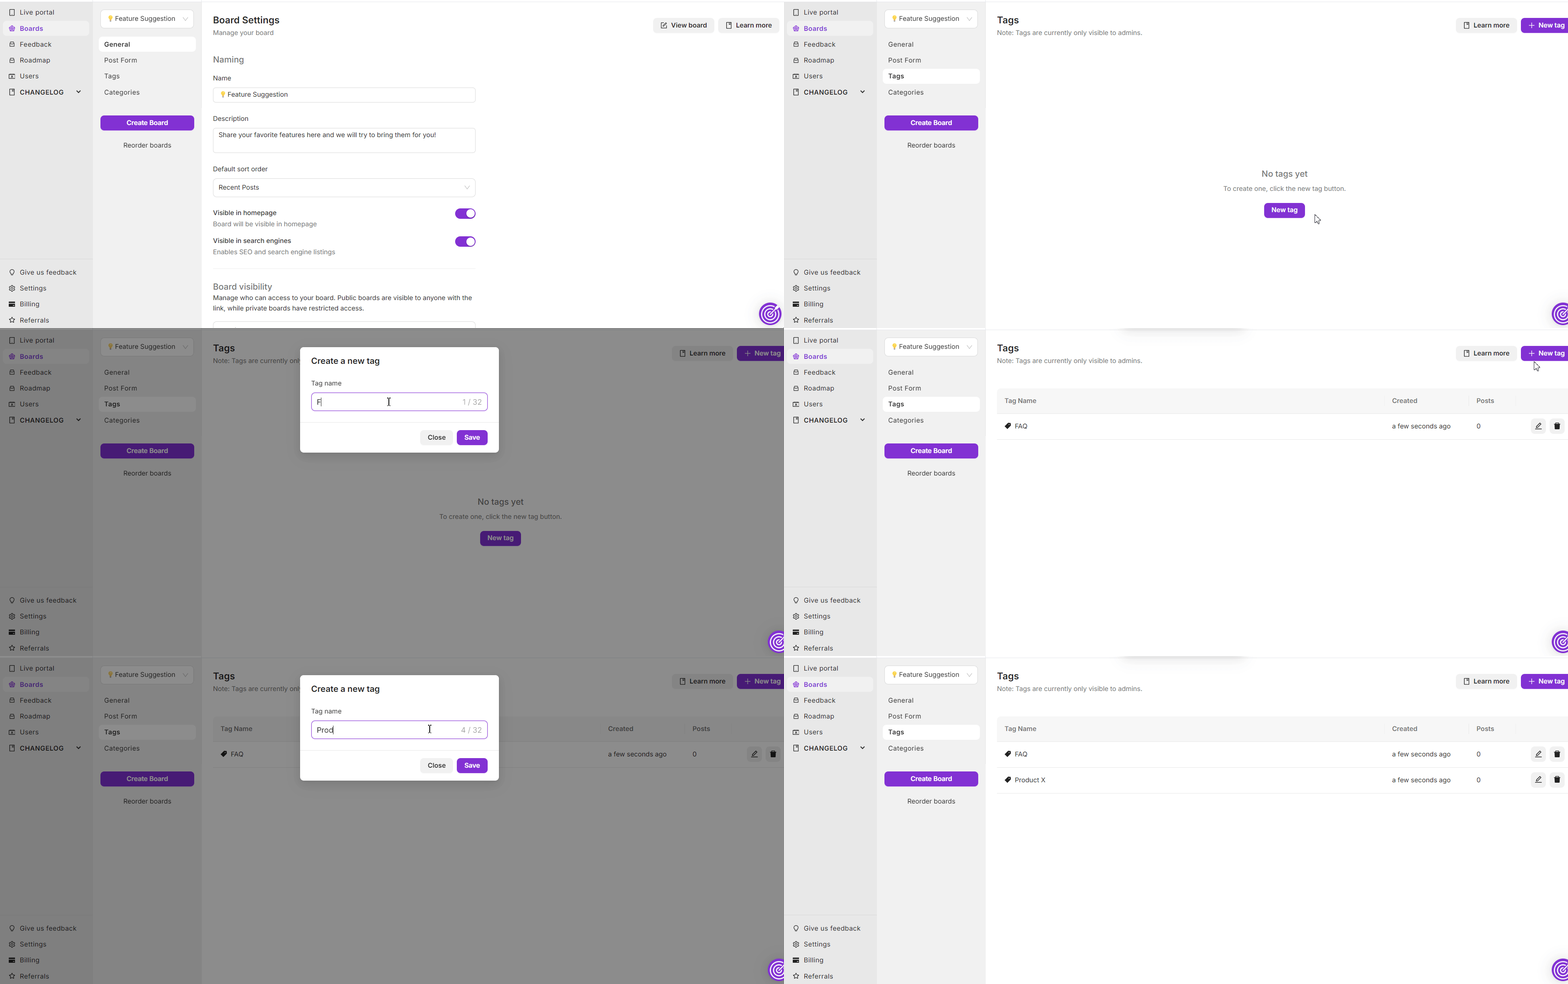
- From your dashboard, go to the specific board where you want to create tags by selecting Boards in the main menu.
- Select Tags from the menu options.
- Click on the + Add Tag button at the top.
- Enter a name for your new tag. Choose a name that clearly categorizes or identifies the topic.
- Click Save to add the tag to your board.

Editing or Deleting Tags
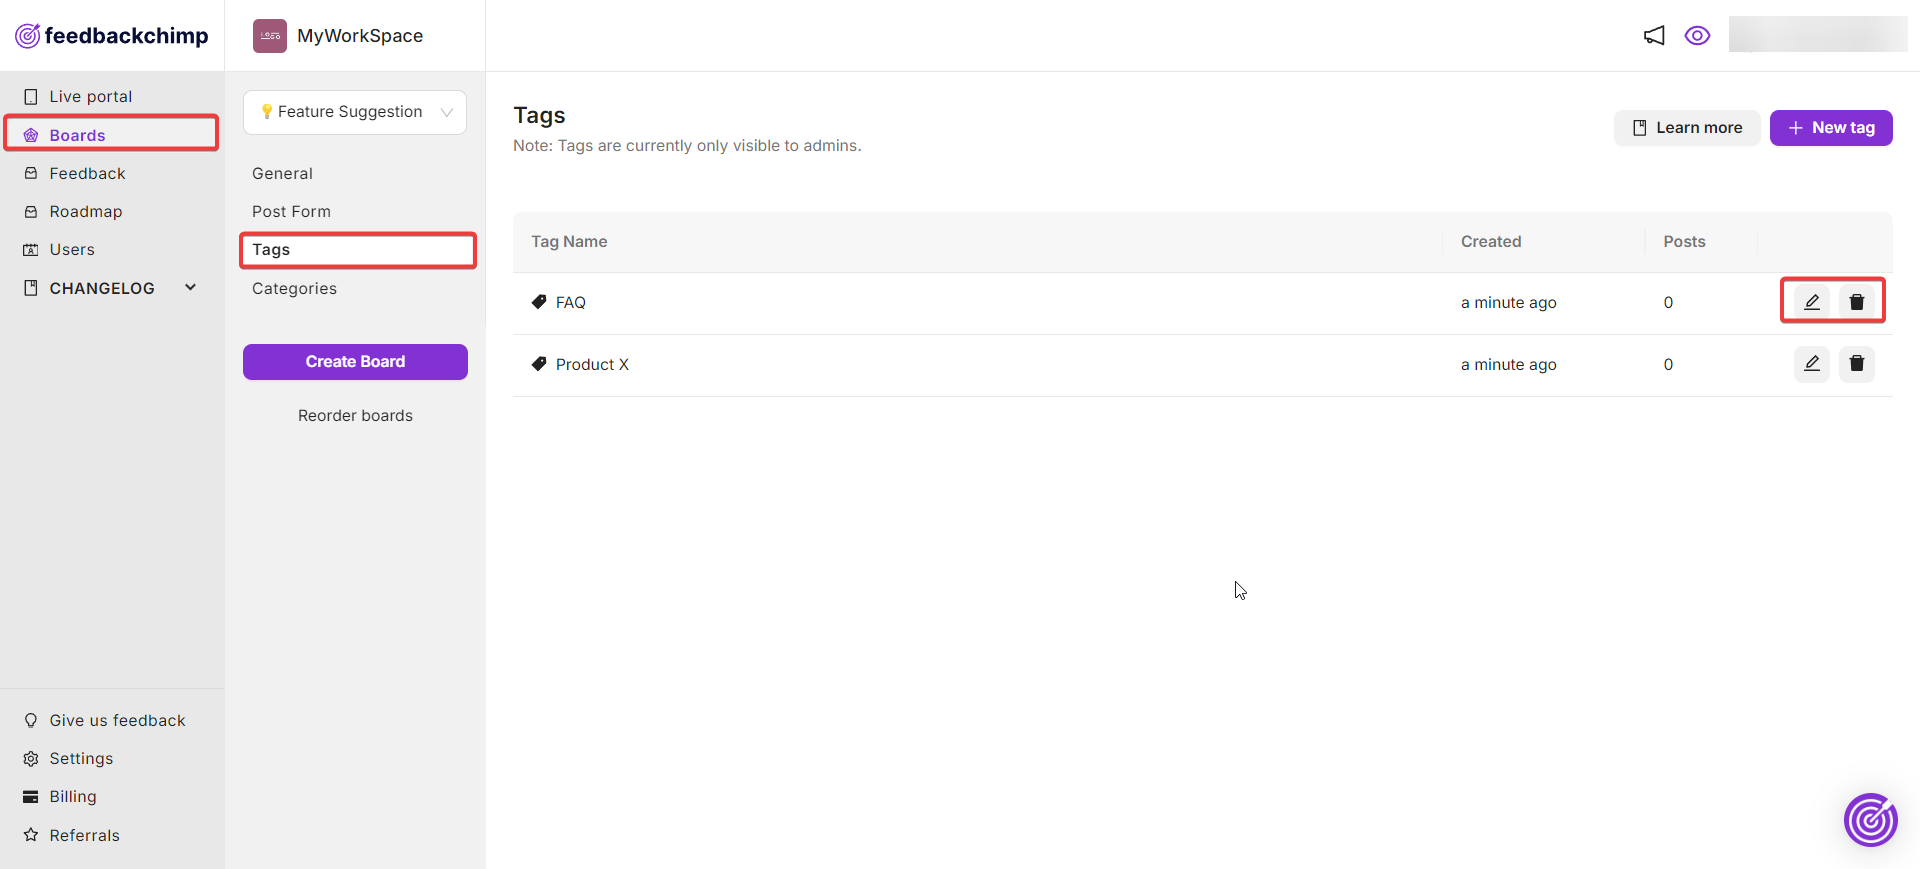
- Navigate to the Boards section from your dashboard and select Tags.
- Click on the Edit icon next to the tag you want to modify. Make any necessary changes to the tag name or color, then click Save.
- Click on the Delete icon next to the tag you want to remove. Confirm the deletion when prompted. Deleting a tag will remove it from all posts that use it.

How to Add Tags to a Post
Tags can also be assigned directly to posts, allowing for real-time categorization.
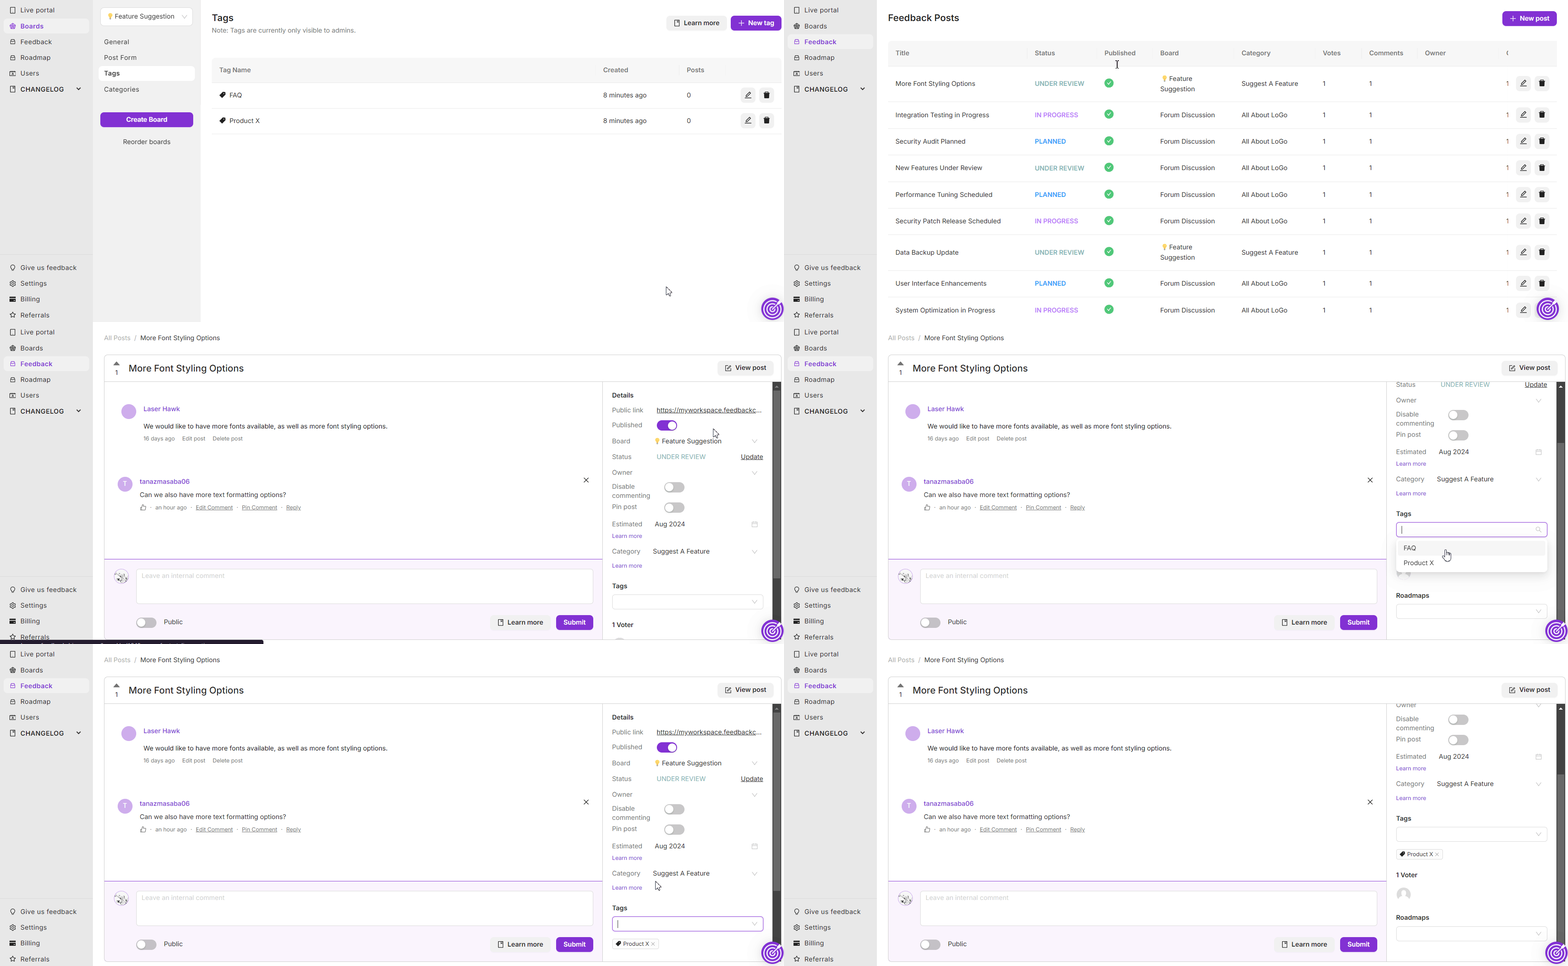
- Go to the Feedback section from your dashboard to view all posts.
- Locate the post you want to tag, then click on the Edit icon next to it.
- In the post editor, go to the right-hand sidebar and find the Tags section.
- Click the Tags field, and choose from the list of existing tags or type to search for a specific tag. You can assign multiple tags to a post.

For additional assistance or inquiries, please reach out to Customer Support.
