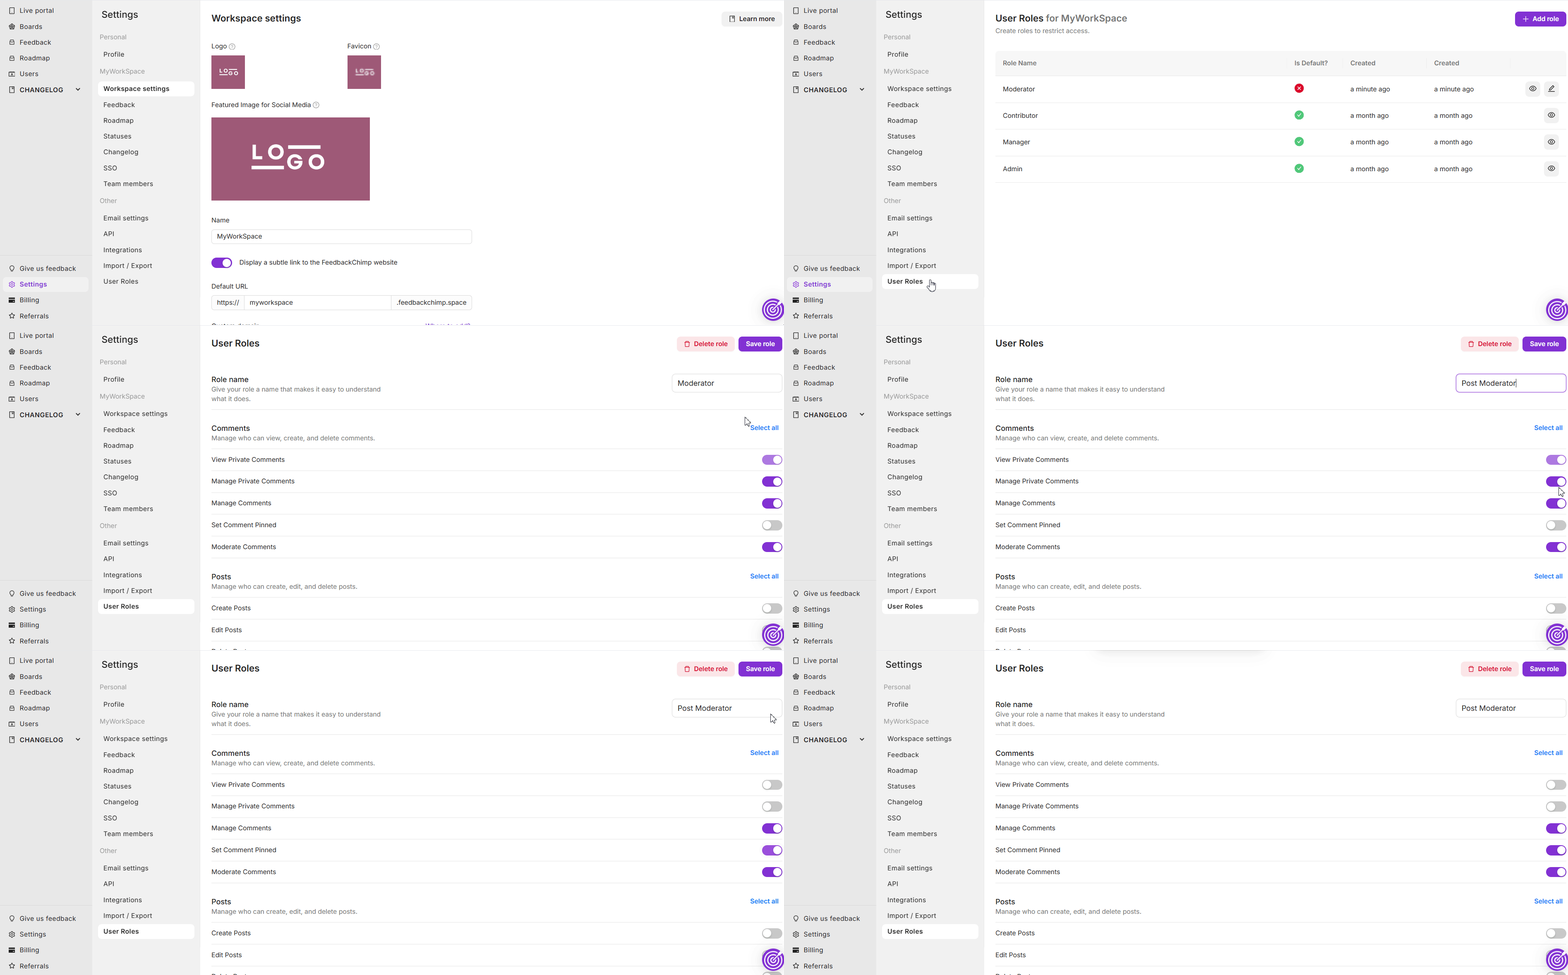
FeedbackChimp provides flexibility in user management by allowing you to create and customize user roles with specific permissions tailored to your team’s needs. If you need to adjust the permissions, access, or name of a custom role, you can do so easily within the User Roles settings.
Note: Adding team members and managing user roles are exclusive features that are only available with the Remove Branding add-on.
Steps to Edit a Custom User Role
Here’s a step-by-step guide on editing a custom user role in FeedbackChimp.
- From your FeedbackChimp dashboard, navigate to Settings and select User Roles.
- In the User Roles section, you’ll see both default and custom roles listed. Locate the custom role you wish to edit.
- Next to the custom role you want to modify, click the edit icon. This action will open a new page for editing the role.
- On the new page, you can adjust the following settings for the custom role:
- Permissions and Access: Update specific permissions to control what users with this role can access and manage within the workspace.
- Role Name: Change the name of the role if needed.
- After making the necessary adjustments, click Save to update the custom role.

Editing custom user roles allows you to fine-tune access and permissions, ensuring that each teammate’s role aligns with their responsibilities within your FeedbackChimp workspace.
For additional assistance or inquiries, please reach out to Customer Support.
