FeedbackChimp allows you to customize the text in your Feedback Portal, providing flexibility to tailor the messaging to your audience. You can change the name and description of feedback boards and fully customize labels on post forms. Below are the steps to edit these elements.
Changing the Name and Description of Boards
You can modify the name and description of each feedback board within your portal:
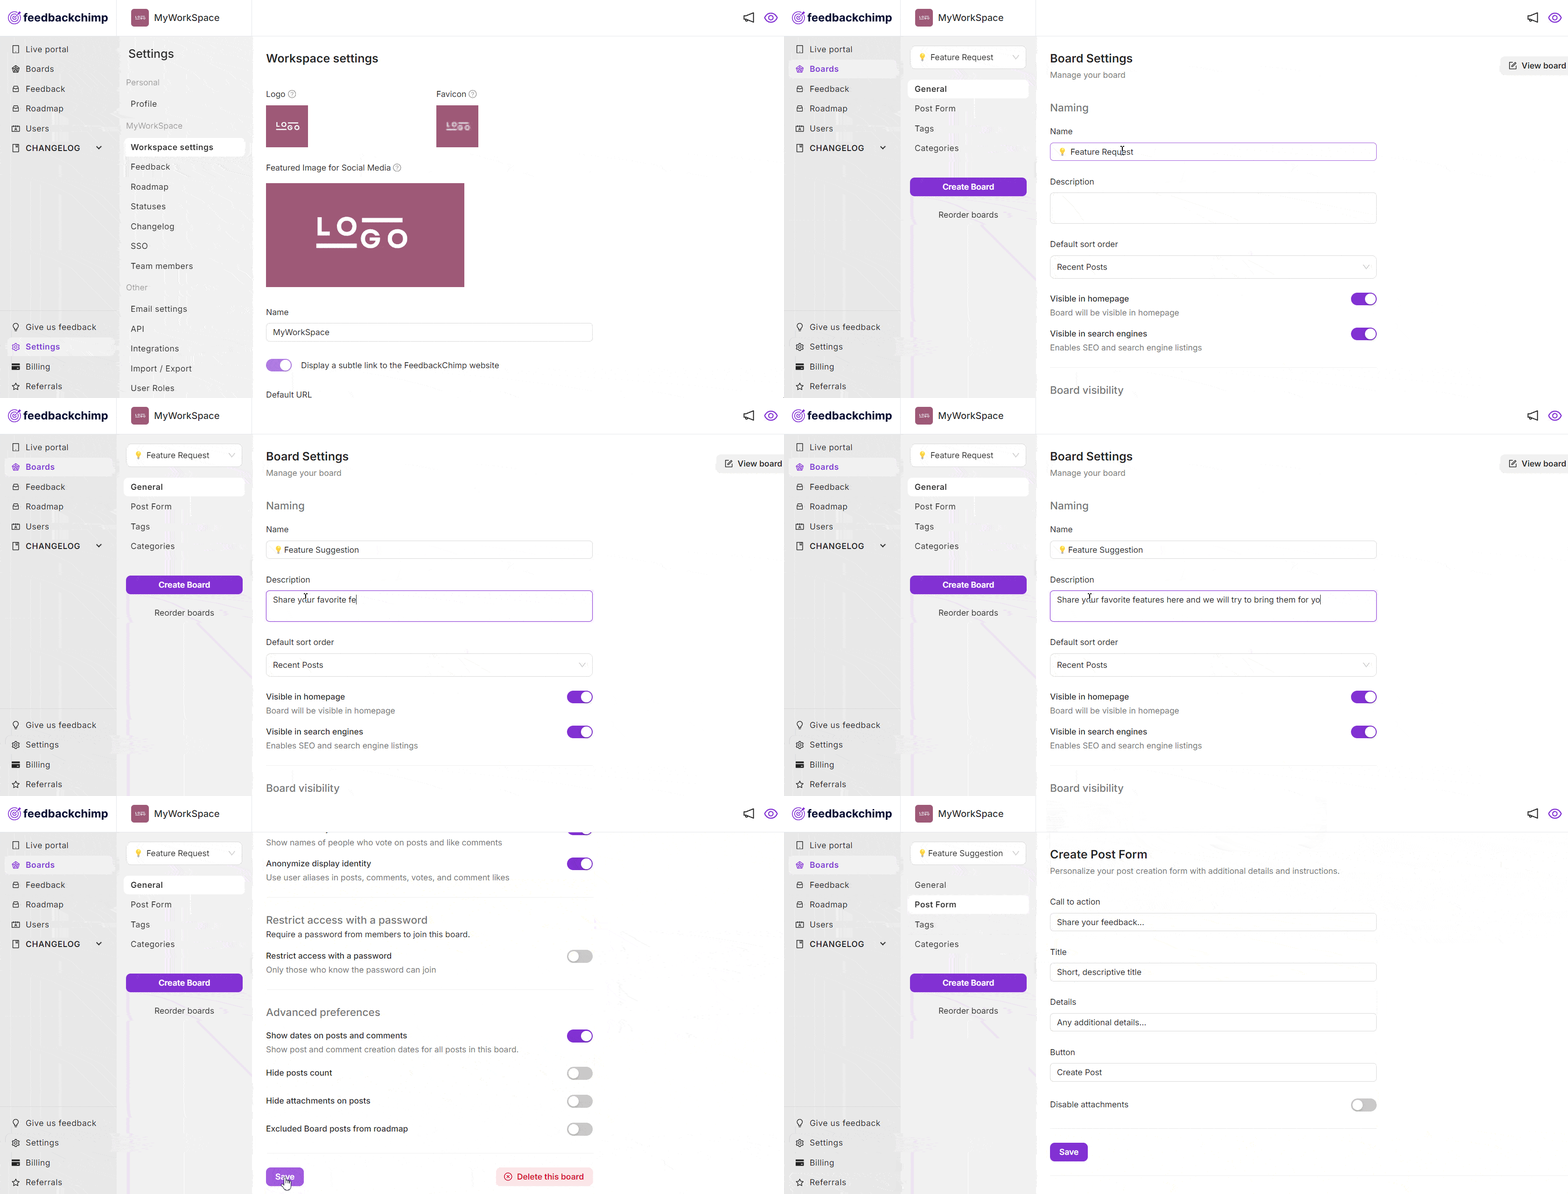
- Click on Boards → General from the dashboard menu.
- Choose the specific feedback board you want to edit.
- Update the Board Name and Board Description fields to reflect your preferred text.
- Save the changes to apply the new settings.

Customizing Labels on the Post Form
To personalize the labels and text used in the post forms, follow these steps:
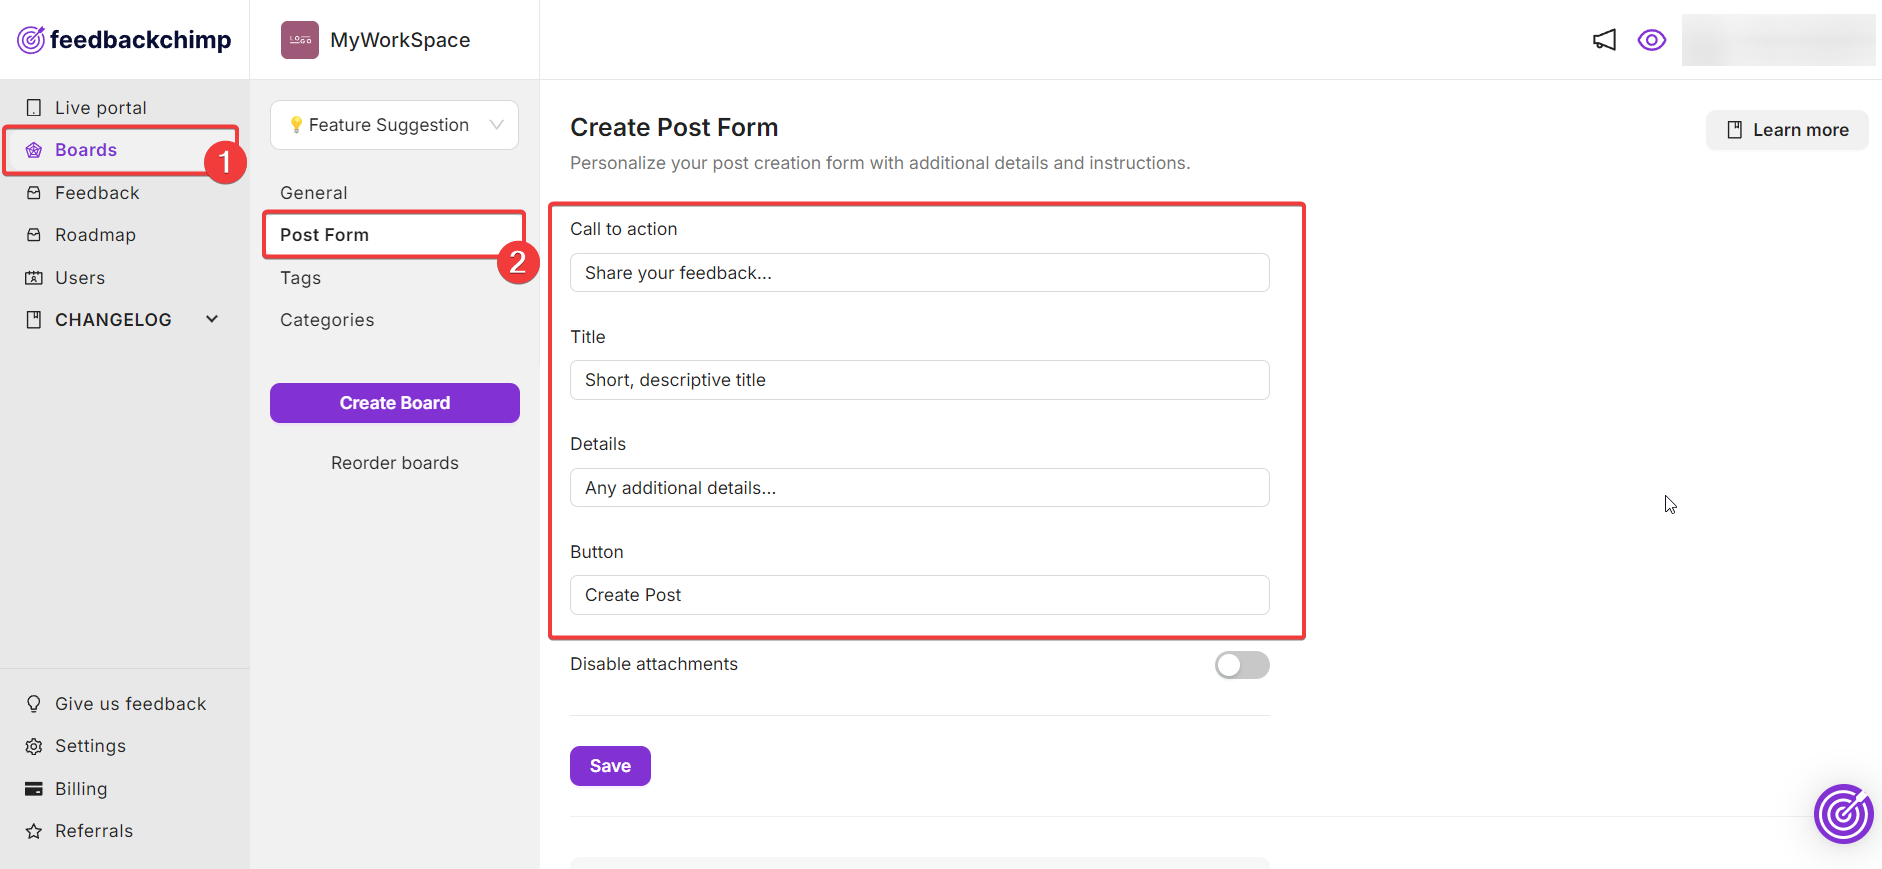
From the dashboard, navigate to Boards → Post Form.
You can then change the following options to better suit your needs:
- Call to Action Text: Update the prompt that encourages users to share their feedback.
- Post Title Label: Edit the label used for the title field in the post form.
- Post Details Label: Customize the label for the details or description field.
- Button Text: Modify the text displayed on the submission button.

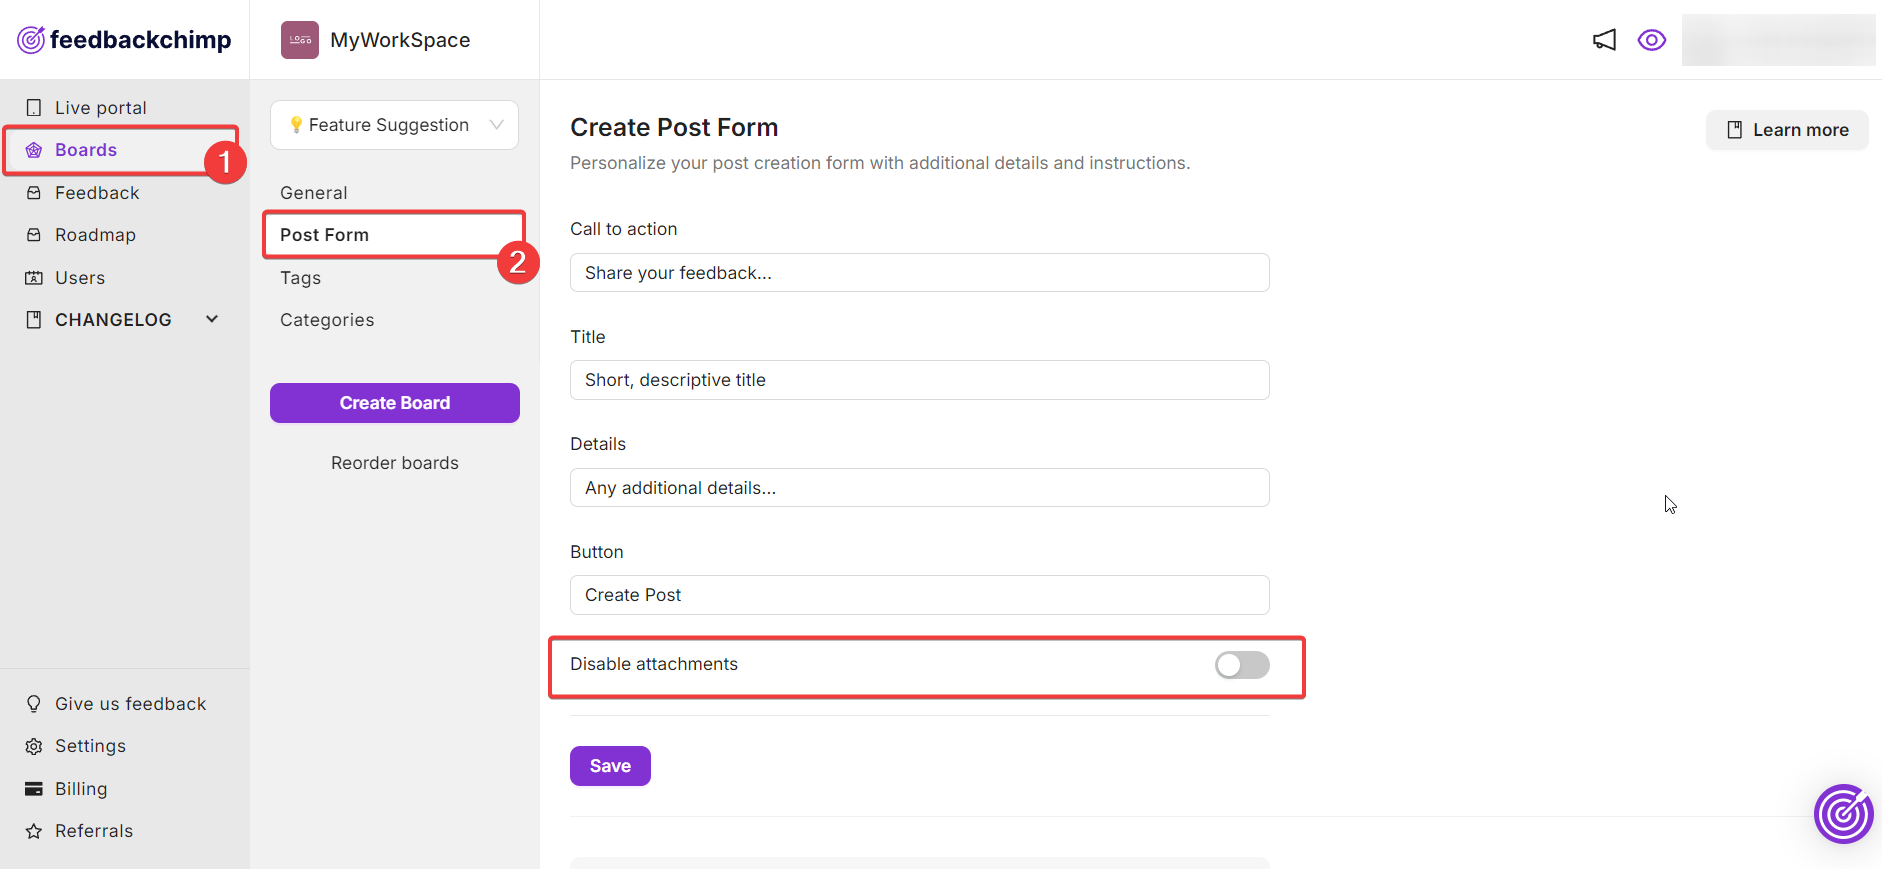
From here, you can also choose whether to allow users to add attachments by toggling the attachment option. After making your changes, click Save to apply your new settings.

Adding New Custom Post Fields
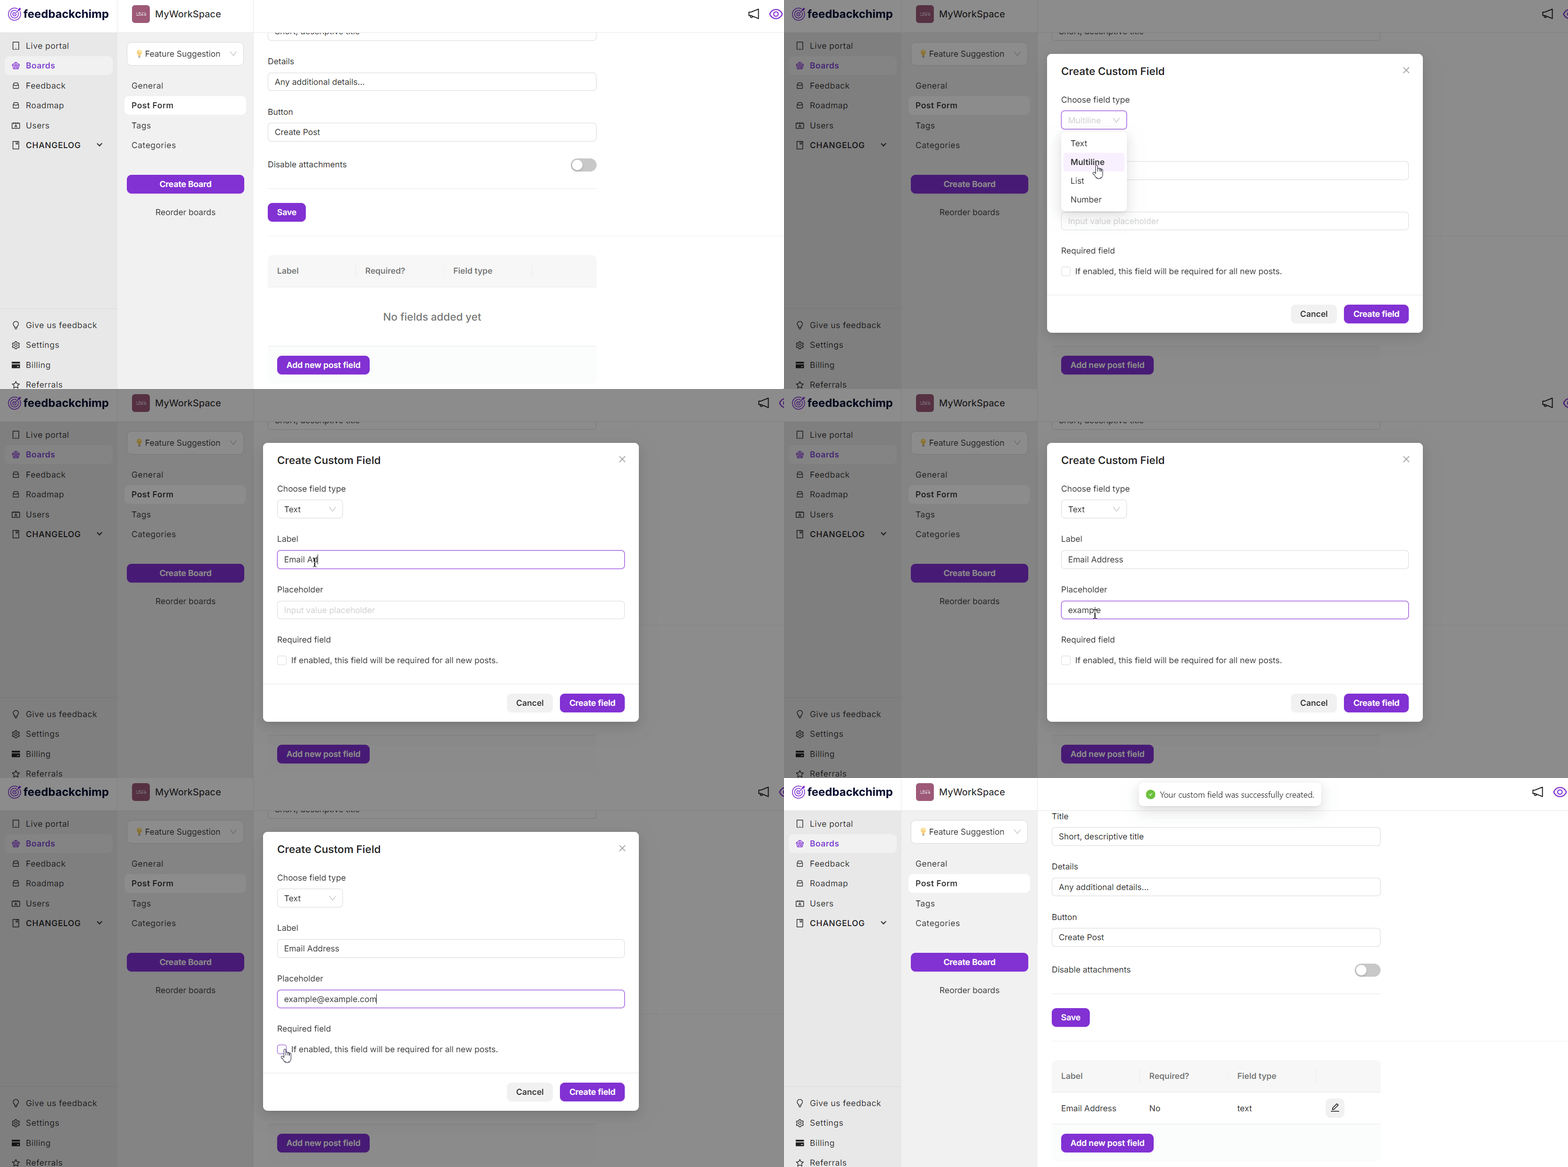
From the Post Form tab shown above, you can scroll down to add new custom fields to your form.
- Scroll down and click on the 'Add new post field' button.
- In the popup, click on 'Choose field type' and select the type of input field for the post from the dropdown list of options.
- Add a label and placeholder value to your form.
- Enable or disable the 'Required field' checkbox as needed.
- Click on 'Create field' button when you are done.

This is how you can fully customize the texts on the labels of any board in your Feedback Portal.
For further assistance or questions, please reach out to Customer Support.
