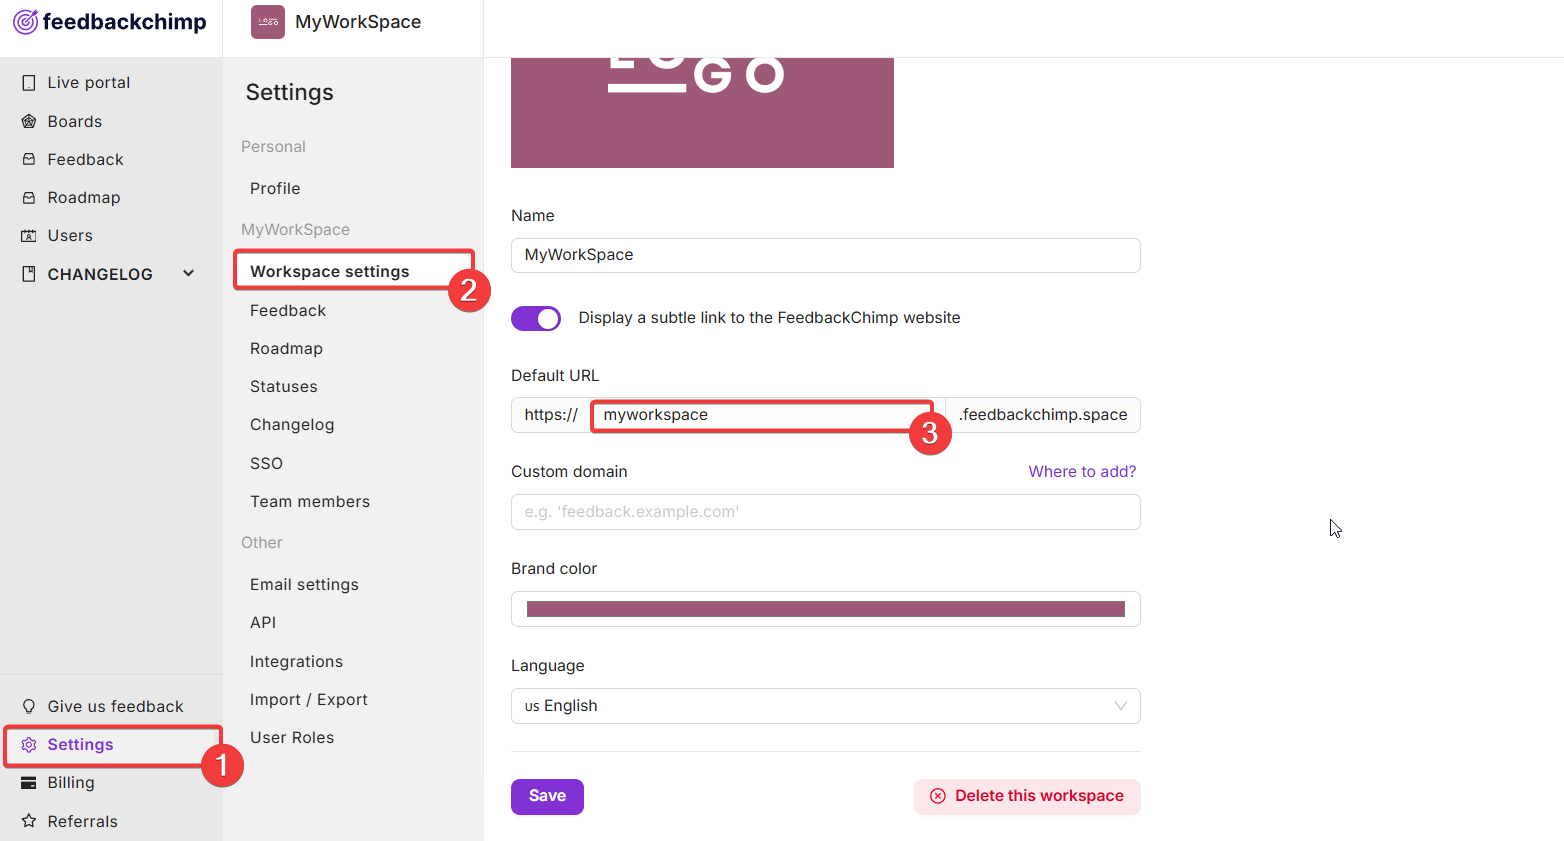
FeedbackChimp allows you to personalize your subdomain to better reflect your brand. Changing your subdomain is quick and does not require any DNS configuration or technical setup.
Steps to Change Your Subdomain
- From your FeedbackChimp dashboard, navigate to Settings > Workspace Settings.
- Scroll down to find the Default URL section.
- In the subdomain field, type your desired subdomain (e.g.,
yourbrand.feedbackchimp.com). Ensure the name is available and reflects your brand or organization. - Click Save to apply the new subdomain. Your feedback boards and other public pages will now be accessible at the updated URL.

⚠️ If the subdomain name does not change even after you click Save, it might be because that subdomain name is already in use by another workspace. Try using a different subdomain name and saving your changes.
Important Notes
- URL Update: Once changed, all links and notifications will reflect the new subdomain.
- Compatibility: Updating your subdomain does not require any DNS or CNAME configuration.
- Branding: You may also consider the Remove Branding add-on if you want to further customize and remove FeedbackChimp branding.
For additional assistance or inquiries, please reach out to Customer Support
