Transitioning from Canny to FeedbackChimp is a seamless process that ensures your feedback data is preserved while taking advantage of FeedbackChimp’s robust features. This guide will help you export your data from Canny and import it into FeedbackChimp efficiently.
Why Migrate to FeedbackChimp?
FeedbackChimp offers a range of tools to manage feedback more effectively, including:
- Customizable Boards: Organize feedback to fit your workflow.
- Advanced Integrations: Connect with tools like Slack, Asana, GitHub, and Zapier.
- Streamlined User Experience: Provide a more tailored and engaging portal for your users.
Exporting Data from Canny
To export your feedback data from Canny:
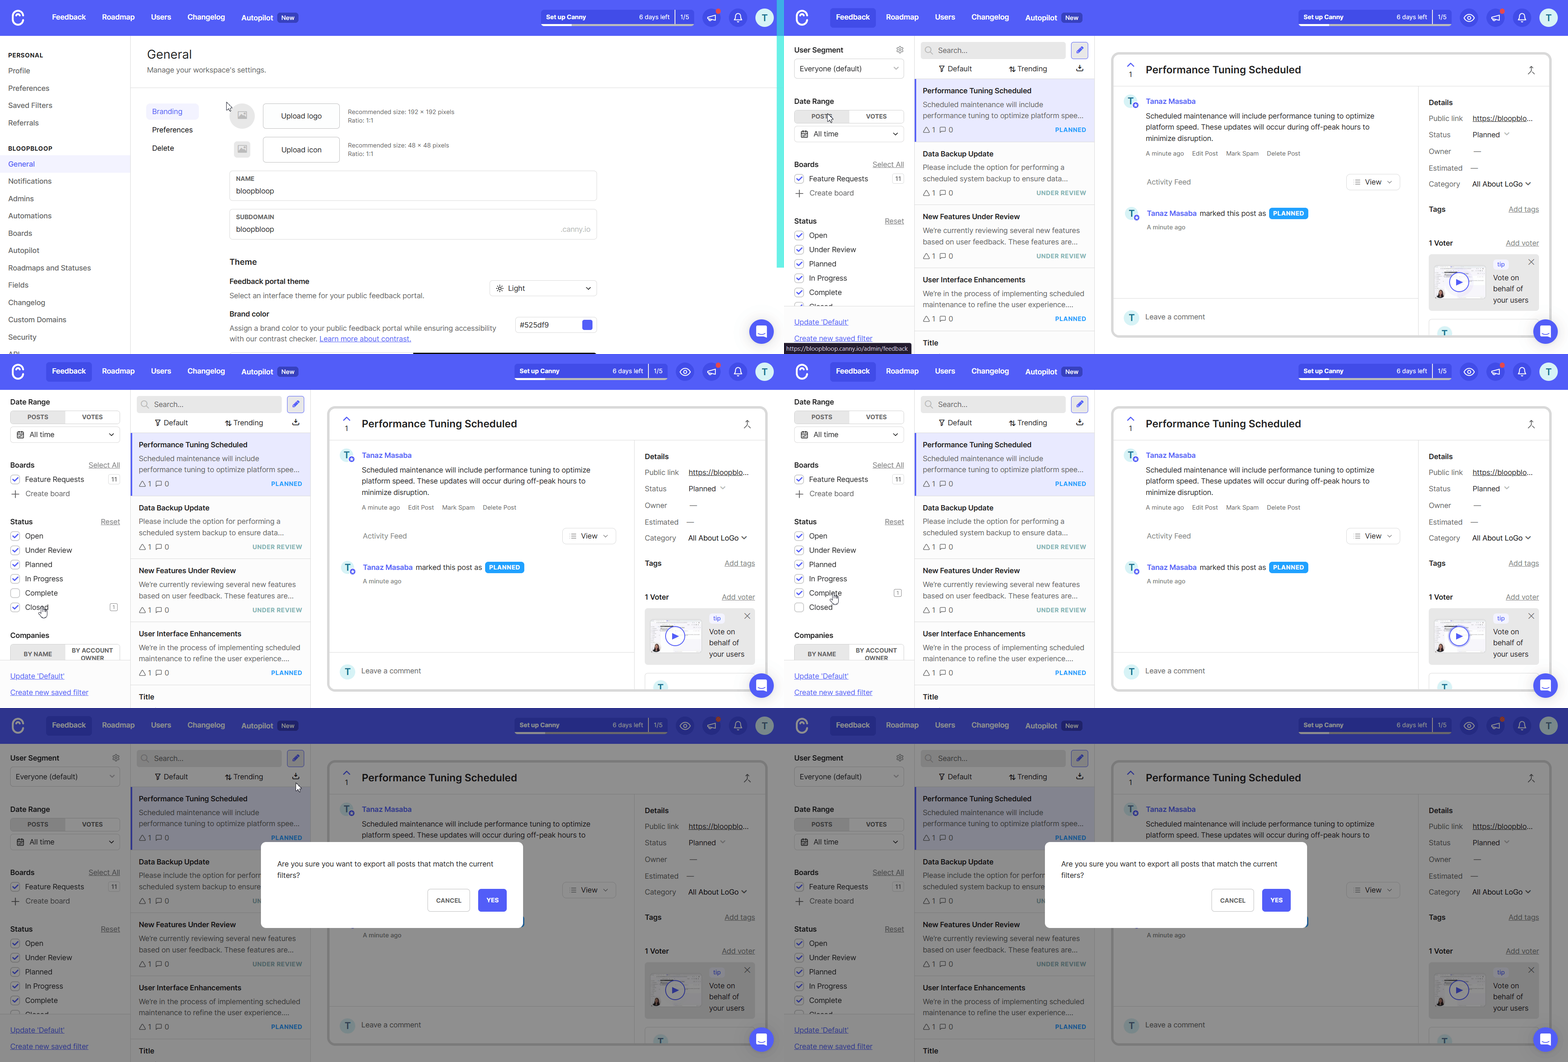
- Log in to your Canny admin account and navigate to your Feedback page.
- Choose the boards, statuses, and tags you want to include in the export. Make sure to select all relevant data to ensure a comprehensive migration.
- Click the Download icon to export your feedback as a CSV file. Save the file to your computer for use in FeedbackChimp.

Importing Data into FeedbackChimp
Once your data has been exported from Canny, follow these steps to import it into FeedbackChimp:
- Go to Settings > Import/Export in the FeedbackChimp dashboard.
- Click Import Data and select the CSV file you exported from Canny.

- Map the fields in the CSV file (e.g., titles, descriptions, statuses, votes, and comments) to the corresponding fields in FeedbackChimp.Learn more about how to map the CSV file correctly in FeedbackChimp by exploring our guide on Importing Data.

- Double-check the mapping to ensure all data is accurately aligned. Once ready, click Import Data to start the migration.
- After the import is complete, review your Feedback Boards to ensure all posts, comments, and votes have been successfully transferred.

💡Tips for a Successful Migration
- Organize Your Data: Before exporting from Canny, remove any unnecessary or outdated posts to keep your feedback organized.
- Notify Your Users: If needed, let your users know about the migration and provide access to the new FeedbackChimp portal.
- Set Up Feedback Boards: Take advantage of FeedbackChimp’s features by organizing boards and categories before the import.
Post-Migration Setup in FeedbackChimp
After the migration, optimize your FeedbackChimp portal by:
- Customizing Boards and Categories: Use FeedbackChimp’s customization tools to create clear and organized feedback boards.
- Enabling Integrations: Connect FeedbackChimp with Slack, Zapier, Asana, or other tools to streamline your feedback workflow.
- Updating Feedback Statuses: Ensure all feedback posts are assigned accurate statuses, such as "Planned," "In Progress," or "Completed."
- Engaging with Users: Encourage users to explore the new FeedbackChimp portal and continue contributing feedback.
For additional assistance or inquiries, please reach out to Customer Support.
