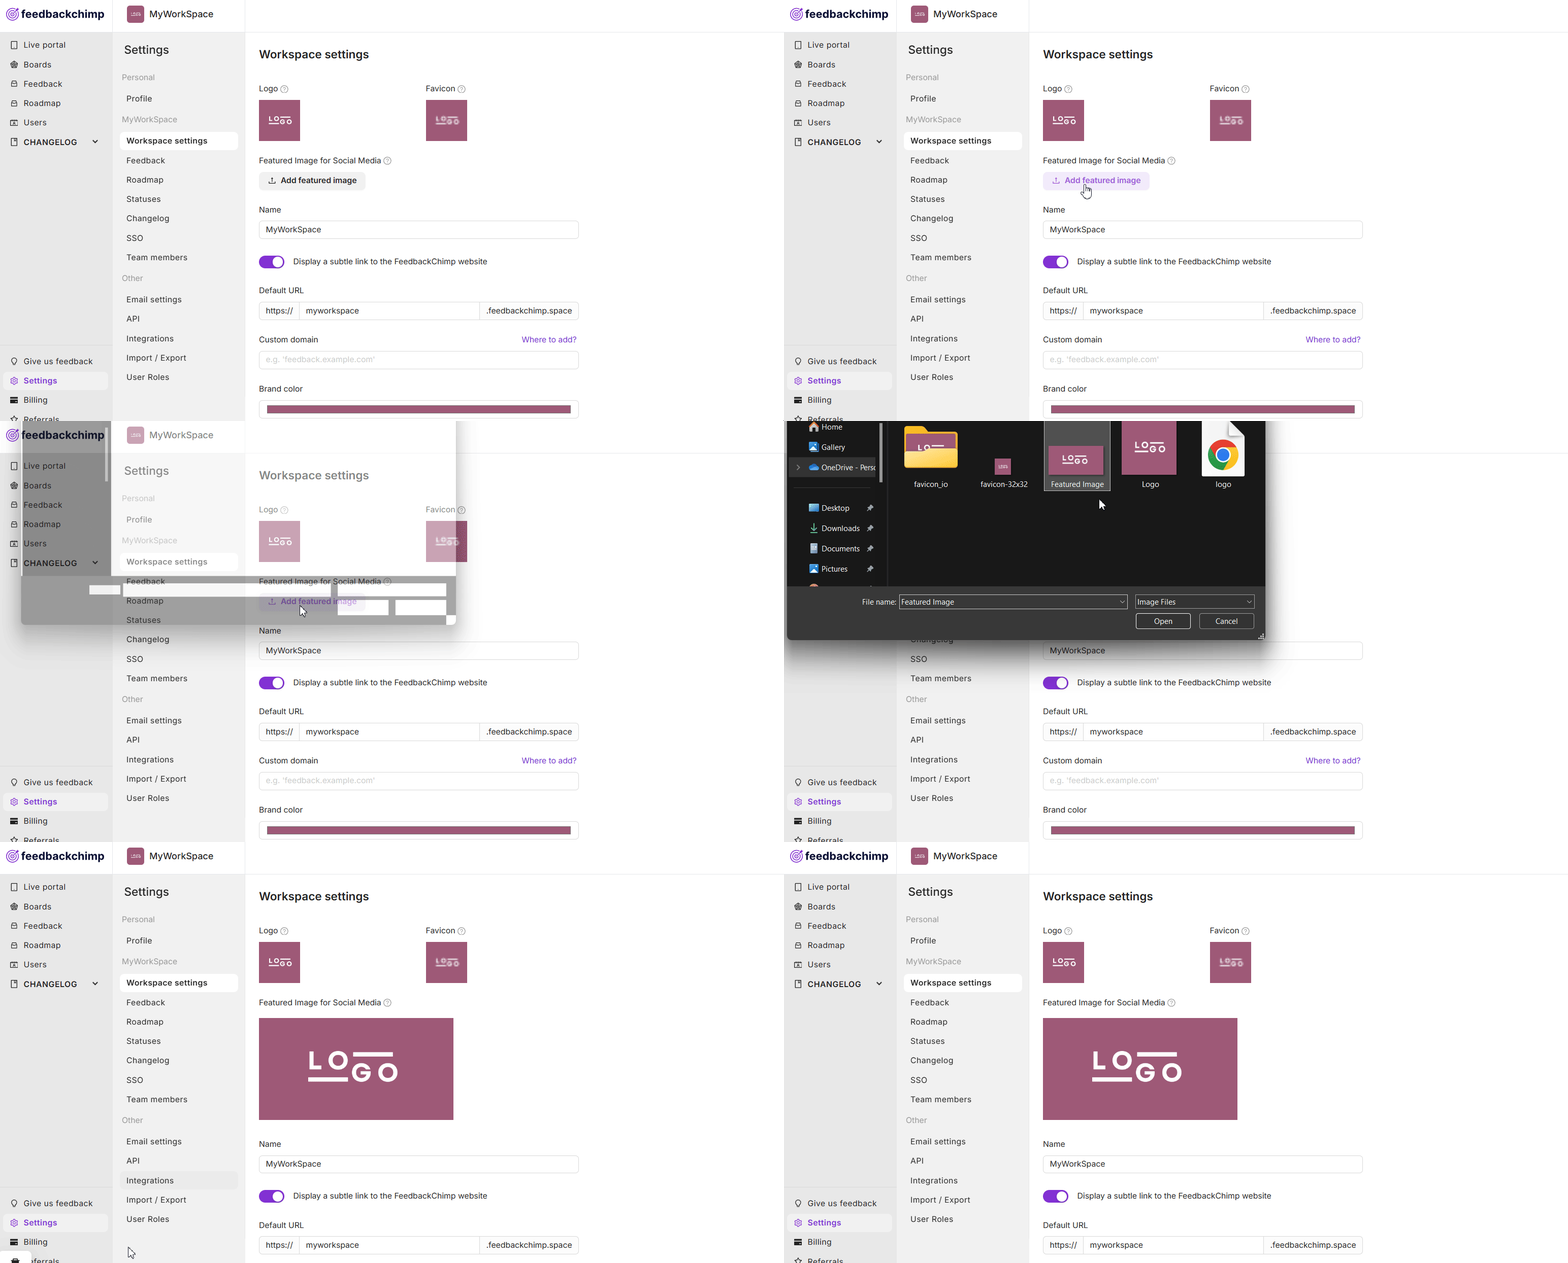
A custom featured image helps enhance your branding by providing a visually distinct image on your public pages. You can upload a featured image that reflects your brand, and it will be displayed across your FeedbackChimp environment.
Here’s how to set it up.
Steps to Set a Custom Featured Image
- Log in to your FeedbackChimp account and navigate to the Settings tab from the left-hand menu.
- Go to Workspace Settings.
- Click on the Add Featured Image button to add your custom image.
- After uploading, confirm the image by clicking Save. Your featured image will now appear on applicable pages, enhancing your organization’s branding.

💡Important Notes
- Recommended Format: A 1200 x 630 pixel image provides the best clarity and visual impact.
- File Size: The image should be no larger than 8MB to ensure quick load times and compatibility.
For additional assistance or inquiries, please reach out to Customer Support
