
In FeedbackChimp, the Single Sign-On (SSO) feature can be enhanced by utilizing JSON Web Tokens (JWT). A JWT is a compact, URL-safe means of representing claims to be transferred between two parties. This documentation outlines the process for creating and signing a JWT for use with SSO in FeedbackChimp, ensuring secure and efficient user authentication.
Note: Single Sign-On (SSO) is an exclusive feature that is only available with the Remove Branding addon.
What is a JSON Web Token (JWT)?
A JSON Web Token (JWT) is a standard format for securely transmitting information between parties as a JSON object. It is commonly used for authentication and information exchange in web applications. JWTs are digitally signed, ensuring that the information contained within them cannot be altered without invalidating the signature.
How to Create and Sign a JWT for SSO in FeedbackChimp
To implement Single Sign-On (SSO) in Feedbackchimp, you'll need to create and sign a JWT (JSON Web Token) that authenticates your users seamlessly. This process involves generating a JWT using your private key, which you’ll retrieve from your Feedbackchimp Dashboard.
You’ll need to write custom code for this setup. If you’re not comfortable with this, consider sharing this guide with a technical team member who can assist.
Steps to Create and Sign a JWT for SSO
To create and sign a JWT for your FeedbackChimp SSO integration, follow these steps:
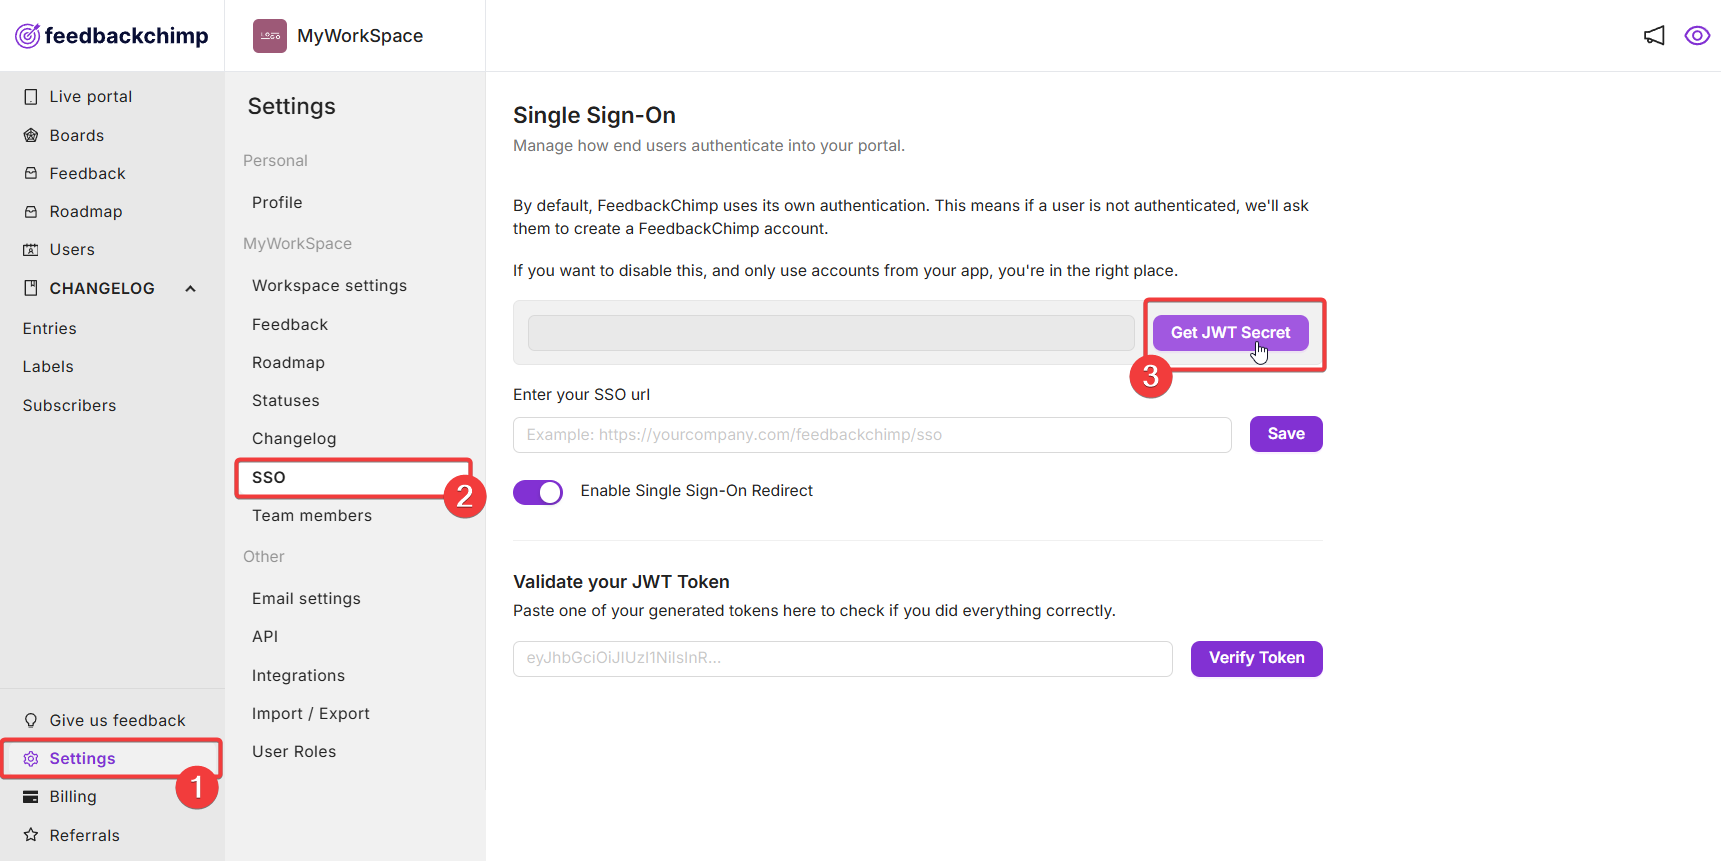
Step 1: Retrieve Your Private Key
- Navigate to Settings → SSO from your FeedbackChimp dashboard.
- Click on the 'Get JWT Secret' button.
- Your JWT Secret key would be automatically copied to your clipboard. Store this key securely on your server. It’s crucial that you do not share this key with anyone to maintain the security of your application.
Step 2: Install Required Packages
Depending on the programming language you’re using, install the necessary libraries to create and sign JWT tokens.
For example,
- In Node.js,
npm install --save jsonwebtoken uuidv4 - In Python
pip install pyjwt uuid
Step 3: Generate the JWT Token
On your server, use your private key to generate a JWT token that includes your user’s data. The token will authenticate the user when they access Feedbackchimp.
Node.js Example
var jwt = require("jsonwebtoken");
const { uuid } = require("uuidv4");
const SSO_KEY = "JWT_SECRET";

function generateJWTToken(user) {
  // jti is used to prevent token replaying attacks. Set JTI to a random value each time you create a token.
  var userData = {
    email: user.email,
    name: user.name,
    jti: uuid(),
  };

  return jwt.sign(userData, SSO_KEY, {
    algorithm: "HS256",
  });
}
Python Example
import jwt
import uuid
from datetime import datetime, timedelta

SSO_KEY = "JWT_SECRET"

def generate_JWT_token(user):
    userData = {
        'email': user['email'],
        'name': user['name'],
        'jti': str(uuid.uuid4())
    }

    return jwt.encode(userData, SSO_KEY, algorithm='HS256')
Ensure you replace JWT_SECRET in your code with the actual secret key you retrieved from the Feedbackchimp Dashboard.
Step 4: Validate Your JWT
After generating the JWT, navigate to Dashboard → Settings → SSO in Feedbackchimp.
Use the validation tool to ensure your JWT is correctly formed and will work as expected. This step helps you verify that everything is set up properly.
Important Considerations
For security reasons, SSO tokens cannot be used to log in users who are admins of any Feedbackchimp organization. Admins will need to sign in manually.
Once you’ve created and validated your JWT, your SSO setup is complete. Users will now be able to log in seamlessly through your application, providing a smooth and secure feedback experience on Feedbackchimp.
For additional assistance or inquiries, please reach out to Customer Support.